Supply and Demand
This description will provide a High Level description of how our Indicator identifies and visualizes Supply and Demand, followed by how to use the Indicator in your trading. At the end we would like to introduce our team and experience.
High Level Description of “Supply and Demand”:
Our indicator searches for price zones where the current Instrument has experienced a significant liquidity imbalance in the recent relative past. Our indicator uses a Multi timeframe approach to identify these areas. These Zones will be referred to as “Active Zones” from now on.
When Price exceeds the outer boundary of the Active Zones, then this Supply or Demand Zone will be identified as “Expired”, and the zone is no longer in play. These Zones will be referred to as “Expired Zones” from now on.
Visualisation:
What do the Boxes mean:
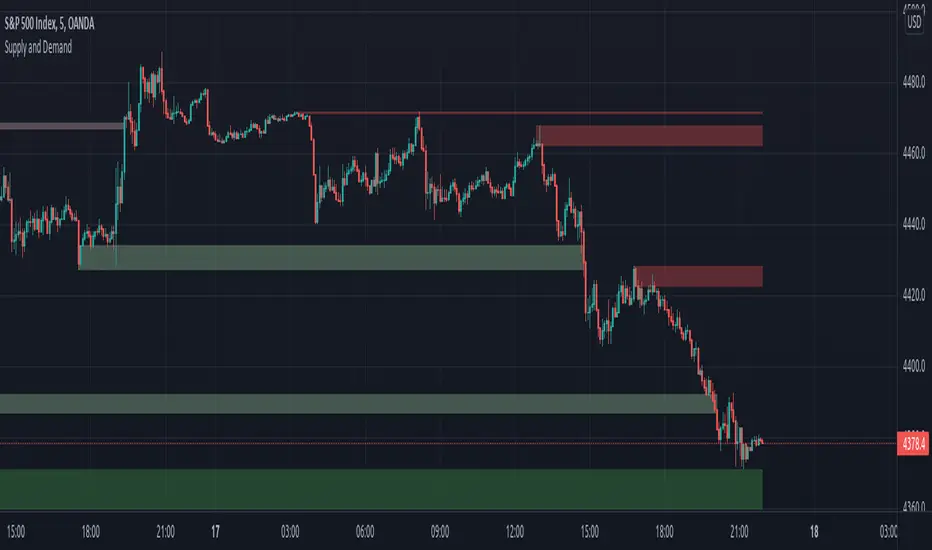
Our Indicator visualises active Supply and Demand Zones. Supply zones are red and Demand Zones are green. Furthermore, our indicator shows a brief history of Expired Supply and Demand Zones. These Zones have the same color as the active Supply and Demand Zones, just with a higher color transparency so that you can distinguish between active and Expired Zones.
The boxes start at the time where the supply/demand has occurred historically, providing a simple method to review the Market reaction to the historic supply/demand event.
History:
Due to the high calculation effort, the history is limited to 20 Zones in total. All zones prior to that will not be displayed.
Important:
All Zones will not be repainted. That being said, once our indicator has started displaying a Zone, then it will be visible until it exceeds the 20 Zone history limit and “falls of” the chart.
How to use it:
Approaching an Active Supply/Demand Zone:
When price is approaching or entering an active Supply/Demand Zone, look for reversal patterns you are familiar with. It is important that you have a tested method behind your entry and exit strategy. Please note, that the indicator itself just presents price areas where there is a potential for a price reversal, and that these levels should not be traded blindly.
Expired Supply/Demand Zones:
Expired Supply and Demand Zones are mainly just to provide a small History of Supply and Demand Zones to you. There are more advanced concepts for also using Expired Supply and Demand Zones in your Trading, but this is not the focus of this Indicator.
Time frame:
This indicator is programmed to be used on all Timeframes.
Instruments:
This indicator aims to visualize areas of where Market price has the potential to reversal, hence this is a mean reverting Indicator.
Taking this statement to account, it is recommended to apply this Indicator to Instruments with a mean reverting character.
Examples of mean reverting markets could be for example …
...all FOREX instruments, as FOREX is considered a mean reverting Market.
...an instrument that is in a consolidation, or which you are expecting to enter a period of consolidation.
Indicator settings and configuration:
The Indicator has no functional parameters, to reduce User error, and only has visual parameters. The color of the Supply and Demand Zones can be tailored to your liking.
Brief concept of Supply and Demand:
Supply and Demand is a concept that has been around for a very long time. Following links are helpful to get a grasp of the concept:
https://en.wikipedia.org/wiki/Supply_and_demandhttps://www.investopedia.com/terms/l/law-of-supply-demand.asp
investopedia.com/terms/l/law-of-supply-demand.asp
Our Team:
We are a team of 3 Traders with a combined experience of 40 years. We are using our experiences from the market to create Indicators to Visualize the most relevant Patterns to us in our trading today. Our goal is to reconstruct these patterns to match our understanding of the market and to simplify the process of creating reproducible trading Strategies.
Added Alerts to Indicator. Right click on Zone to set Alert.
Script su invito
Solo gli utenti approvati dall'autore possono accedere a questo script. È necessario richiedere e ottenere l'autorizzazione per utilizzarlo. Tale autorizzazione viene solitamente concessa dopo il pagamento. Per ulteriori dettagli, seguire le istruzioni dell'autore riportate di seguito o contattare direttamente account_closed.
TradingView NON consiglia di acquistare o utilizzare uno script a meno che non si abbia piena fiducia nel suo autore e se ne comprenda il funzionamento. È inoltre possibile trovare alternative gratuite e open source nei nostri script della community.
Istruzioni dell'autore
Declinazione di responsabilità
Script su invito
Solo gli utenti approvati dall'autore possono accedere a questo script. È necessario richiedere e ottenere l'autorizzazione per utilizzarlo. Tale autorizzazione viene solitamente concessa dopo il pagamento. Per ulteriori dettagli, seguire le istruzioni dell'autore riportate di seguito o contattare direttamente account_closed.
TradingView NON consiglia di acquistare o utilizzare uno script a meno che non si abbia piena fiducia nel suo autore e se ne comprenda il funzionamento. È inoltre possibile trovare alternative gratuite e open source nei nostri script della community.