Polynomial Regression Clustering [LuxAlgo]The Polynomial Regression Clustering indicator utilizes K-Means clustering to categorize historical price data into discrete levels and fits polynomial regression curves to each identified cluster.
This tool allows traders to visualize non-linear trends within specific price regimes, providing a unique perspective on support, resistance, and price momentum.
🔶 USAGE
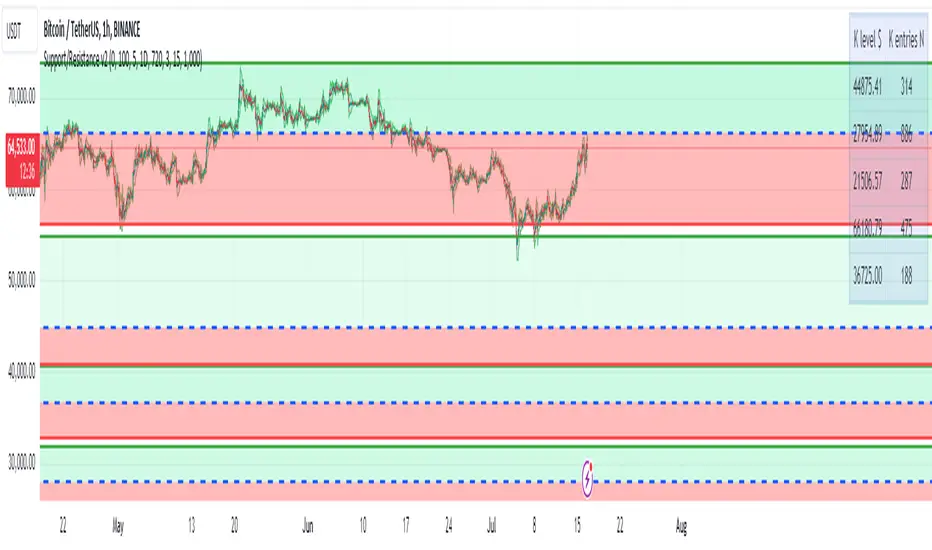
The indicator identifies "K" number of clusters based on the vertical distribution of price over a user-defined lookback period. Each cluster represents a group of bars that share similar price levels, and a polynomial regression line is calculated to represent the localized trend for that specific group.
🔹 Cluster Identification
The script groups price action into color-coded dots. By default, it uses the HL2 (Average price) to determine which cluster a bar belongs to. This is particularly useful for identifying historical value areas where price has spent a significant amount of time.
🔹 Polynomial Fitting
Unlike standard linear regression, which produces a straight line, the polynomial regression curves can bend to fit the data more accurately.
A Polynomial Degree of 1 will result in a standard linear regression (straight lines). A Polynomial Degree of 2 or higher allows for curves that capture parabolic moves or cyclical swings within each cluster.
🔹 Future Projections
The current active cluster (the one containing the most recent price point) can be projected into the future. This allows you to see where the localized trend for the current price regime is heading based on the mathematical fit of historical data.
🔶 DETAILS
🔹 K-Means Algorithm
The script uses an iterative K-Means algorithm to find the optimal centroids (center points) for the price levels. It calculates the distance of each price point to the nearest centroid and refines the centroid position until the clusters are stable or the maximum iterations are reached.
🔹 Regression Logic
Once price points are assigned to a cluster, the script solves for the coefficients of a polynomial equation that minimizes the distance between the line and the cluster's data points. To ensure numerical stability with higher degrees, the horizontal (time) axis is normalized before performing matrix operations.
🔶 SETTINGS
🔹 K-Means
Number of Clusters (K): Defines how many price levels the indicator should look for. Higher values create more granular levels. Lookback Period: The number of recent bars used to perform the clustering and regression calculation. Max Iterations: The maximum number of refinement steps for the K-Means algorithm.
🔹 Regression
Polynomial Degree: Controls the "bend" of the regression lines. Higher degrees allow for more complex curves. Extend All Fits to Current Bar: When enabled, the regression lines for all historical clusters are extended to the rightmost edge of the chart. Project Current Cluster into Future: Extends the current regime's regression line into the future (empty space) using a dashed line.
🔹 Visual Style
Show Regression Lines: Toggles the visibility of the polynomial curves. Show Cluster Dots: Toggles the visibility of the colored dots on each price bar. Dot Size: Adjusts the size of the cluster dots. Cluster Colors: Customizable colors for each of the identified clusters.
Indicatore Pine Script®