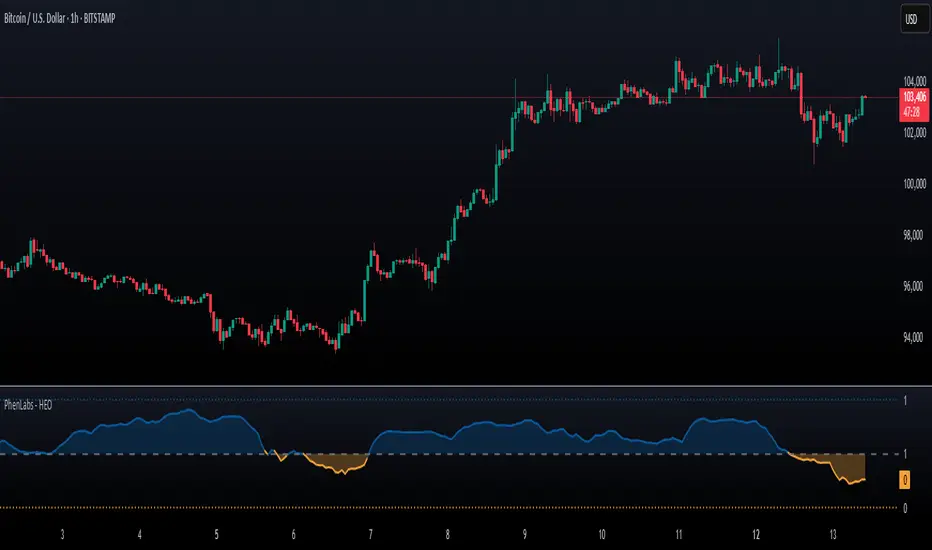
Supertrend Confirmed Close | forexs# Supertrend Confirmed Close
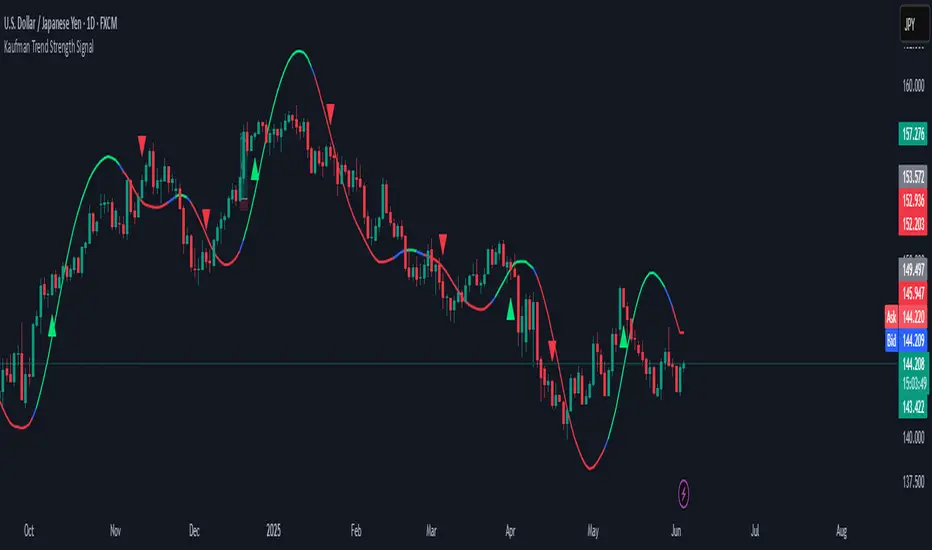
Supertrend Confirmed Close is an open source modification of the classic ATR based Supertrend indicator. Its main purpose is to confirm trend reversals only after the current bar has closed, so temporary intrabar crossings do not create confirmed Buy or Sell signals.
## How it works
The indicator builds trailing volatility bands from Average True Range and a user selected price source.
Default settings:
ATR Period: 10
ATR Multiplier: 3.0
Source: HL2
ATR Method: Wilder ATR
An SMA of True Range can also be selected as an alternative ATR calculation.
During a bullish state, the lower Supertrend band trails price. During a bearish state, the upper Supertrend band trails price.
A bullish reversal is confirmed when the previous trend state is bearish and a completed bar closes above the previous bearish Supertrend band.
A bearish reversal is confirmed when the previous trend state is bullish and a completed bar closes below the previous bullish Supertrend band.
## What is different in this version
This implementation adds explicit closed bar confirmation to the reversal logic. The trend state, Buy signal, Sell signal, and direction change alerts are not confirmed until the bar is complete.
It also includes an optional "Freeze Supertrend Line Until Candle Close" setting. When enabled, the displayed active Supertrend line remains at its previous confirmed value while the realtime bar is forming, then updates when the bar closes.
Other additions include Pine Script v6 compatibility, organized inputs, optional trend change circles, trend highlighting, and separate alert conditions for bullish, bearish, and any confirmed direction change.
## Signals and alerts
BUY marks a confirmed change from a bearish Supertrend state to a bullish Supertrend state.
SELL marks a confirmed change from a bullish Supertrend state to a bearish Supertrend state.
These labels describe the indicator's trend state. They are not forecasts or guarantees of future price direction.
Alert conditions are provided for confirmed Buy, confirmed Sell, and confirmed direction changes. Users may also select TradingView's Once Per Bar Close frequency when creating an alert.
## Settings
Users can adjust the ATR period, ATR multiplier, source, and ATR calculation method. Buy and Sell labels, trend change circles, trend highlighting, and realtime line freezing can also be enabled or disabled.
## Limitations
Supertrend is a trend following method. In sideways or choppy markets it can change direction frequently and produce false or late signals.
Closed bar confirmation intentionally waits until the bar is complete. This avoids treating temporary intrabar crossings as confirmed reversals, but it can also make signals occur later than an intrabar implementation.
ATR settings materially affect sensitivity. Different symbols, market conditions, and timeframes can produce different behavior.
This indicator does not include position sizing, stop loss rules, profit targets, trade management, or performance guarantees. It should not be treated as a complete trading system.
For signal based use, apply it to standard price charts such as regular candles or bars rather than synthetic chart types whose prices do not represent directly traded market prices.
## Credits and open source reuse
This script reuses and modifies the open source SuperTrend implementation published by TradingView author KivancOzbilgic. That publication also credits everget, Alex Orekhov, for inspiration related to highlighting, signals, and alerts.
The reused Supertrend logic is credited here in accordance with TradingView's open source reuse requirements. This modified publication should remain open source unless the necessary permission for another publication mode has been obtained from the original author.
## Disclaimer
This indicator is provided for technical analysis and educational purposes only. It is not financial or investment advice. No signal or indicator can guarantee a profitable outcome.
Indicatore

Adaptive Trend Direction Indicator [ATR Trail + Regime]Adaptive Trend Direction
WHAT IT DOES
Adaptive Trend Direction is a trend-following state indicator. It answers three questions on every bar: which way is the trend pointing, is the market currently orderly enough for a trend signal to be worth taking, and where is the level that would invalidate that view.
The core is an ATR trailing stop that flips between a bullish and a bearish state. On its own a trailing stop flips constantly in choppy conditions, which is the well-known failure mode of every trend follower. This script's purpose is to gate those flips behind a two-factor regime test, so that the flips which occur inside directionless price action are marked as such instead of being presented as trend signals.
HOW IT WORKS
ATR trailing stop. A stop is placed one ATR-multiple away from the close (default ATR 23, multiplier 3.0). While the state is bullish the stop only ratchets upward; while bearish it only ratchets downward. A close beyond the stop flips the state and the stop jumps to the opposite side of price. The state flip is the raw directional signal.
Regime detection — ADX plus Efficiency Ratio. Two independent measures must agree before the market counts as trending. ADX (default period 10) must exceed its threshold (default 21), measuring directional strength. Kaufman's Efficiency Ratio must exceed its threshold (default 0.15), calculated as the absolute net move over N bars divided by the sum of the absolute bar-to-bar moves over the same window — a value near 1 means price travelled in a straight line, a value near 0 means it covered the same ground repeatedly. ADX can rise on volatile chop; the Efficiency Ratio cannot. Requiring both is what filters out that case.
Hysteresis. The regime does not flip the moment the two tests agree. It requires N consecutive confirming bars (default 3) before switching, in either direction. This stops the regime label from oscillating bar to bar around the thresholds, which would otherwise reintroduce the exact noise the filter is meant to remove.
RSI momentum filter. A directional flip is only accepted if RSI confirms it — above the long threshold for longs, below the short threshold for shorts. The defaults (48 long, 43 short) sit close to the midline, so this rejects flips that occur against prevailing momentum rather than demanding an extreme reading.
Signal end conditions. An open directional signal is marked as finished on whichever comes first: an opposing trailing-stop flip, an EMA slope reversal against the signal (optional, off by default), or a maximum bar count (default 140) that retires a signal which has gone nowhere.
Optional mean-reversion mode. When the regime is ranging, the default behaviour is to stand aside — no signals are generated. Setting "Ranging Mode" to 1 instead generates counter-trend signals from RSI extremes (default below 30 / above 70) with ATR-based take-profit and stop levels drawn on the chart. This is opt-in because it is a different premise from the rest of the script and should be evaluated separately.
WHAT YOU SEE ON THE CHART
Trailing stop line, green in the bullish state and red in the bearish state.
Background tint: green while the regime is trending, amber while ranging.
Triangles mark trend signals, circles mark mean-reversion signals, crosses mark where a signal ends.
Bars are tinted while a signal is active, so the held periods are visible at a glance.
A label at the end of each signal shows the percentage move over that leg, with a tooltip giving entry, exit, end reason and bars held. This is a measurement of the price move between two chart events. It is not a return, and it accounts for no costs.
A dashboard reports ATR, stop level, direction, RSI, EMA slope, regime with live ADX/ER values, current signal state, and which components are switched on.
SIZING READ-OUT
The dashboard also reports a volatility-normalised exposure figure: leverage that scales inversely with recent ATR so that a fixed percentage of a reference account is at risk regardless of how volatile the market currently is, clamped between a floor and a ceiling. Setting the vol target to 0 switches to a stop-distance-based calculation instead. This is informational only. It gates no signal, and the reference account size affects only the displayed units — the leverage figure itself is independent of it.
WHY THIS IS AN INDICATOR AND NOT A STRATEGY
The script tracks an internal long/short/flat state so the chart can colour bars and measure each leg, but it submits no orders and produces no Strategy Tester report. That is intentional. Fill assumptions, funding and leverage modelling on a leveraged instrument dominate any backtest of a system like this, and a tester report would imply a precision the model does not have. What is shown here is the signal logic and the price move between signals, which is what can be verified directly on the chart.
SETTINGS AND USAGE NOTES
The defaults were fitted by a parameter search on a single market and timeframe (BTC on a 6-hour chart). They are a starting point for that context, not universal values, and there is no reason to expect them to transfer unchanged to other symbols or timeframes — the ATR multiplier and the regime thresholds in particular are the ones to revisit first. The volatility estimate used by the sizing read-out assumes roughly a 6-hour bar; on other timeframes it should be recalibrated.
Every component has an independent toggle, so the contribution of each can be isolated: turn the regime filter off to see the raw trailing-stop flips, then turn it back on to see which ones it removed. Signals are evaluated on bar close.
Alerts are available for signal start and signal end, in plain text or as a JSON body for programmatic consumers.
LIMITATIONS
This is a trend-following model. It will give back open gains at every reversal, because the exit is a trailing stop rather than a target. It will produce clustered false flips at regime boundaries, since the confirmation delay lags a genuine turn by design. The mean-reversion mode takes positions against the prevailing move and behaves very differently from the trend mode. Signal-leg percentages shown on the chart exclude commission, slippage and funding.
Published open-source. Not financial advice, not a recommendation to trade any instrument, and nothing here is a forecast. Test it yourself before relying on it. Indicatore

StackLight MTF | MTF Momentum Stack + Stochastic ConfluenceThe strategy only fires a signal when three timeframes of your choosing — fast, medium, and slow — all agree on direction. Each timeframe is scored bullish, bearish, or neutral using either RSI or EMA slope, and displayed as a live 3-light traffic signal in the corner of your chart. Green means go, red means no — and when all three lights match, the strategy arms itself for entry.
Once the stack is aligned, entries are triggered by a stochastic %K/%D crossover on your chart timeframe, confirmed by a linreg-smoothed stochastic on your slowest timeframe — so you're not just trading a momentum cross in isolation, you're trading one that's backed by higher-timeframe agreement.
Risk is handled with ATR-based stops and targets, and position size adjusts automatically so every trade risks a fixed percentage of your account — no more, no less — regardless of how wide or tight the current stop distance is. An optional "stack flip" exit closes trades early if the multi-timeframe alignment breaks down before your stop is hit, cutting losers faster than a static stop alone.
Features
3-light traffic signal table — instant visual read of alignment across your fast/medium/slow timeframes
Dual momentum modes — RSI (with adjustable neutral band to reduce flip-flopping) or EMA slope
Linreg-smoothed MTF stochastic — filters out the staircase artifact from pulling higher-timeframe data
Bias label — STRONG BULL / BULL LEAN / NEUTRAL / BEAR LEAN / STRONG BEAR at a glance
Background tint + bar coloring — full-chart visual confirmation, not just the indicator pane
Risk-based position sizing — fixed % equity risk per trade, auto-scaled to current ATR
ATR stop/target + stack-flip early exit — two independent exit mechanisms
Built-in alert conditions for long/short signals — ready for automation
Long-only, short-only, or both — directional bias control in one input
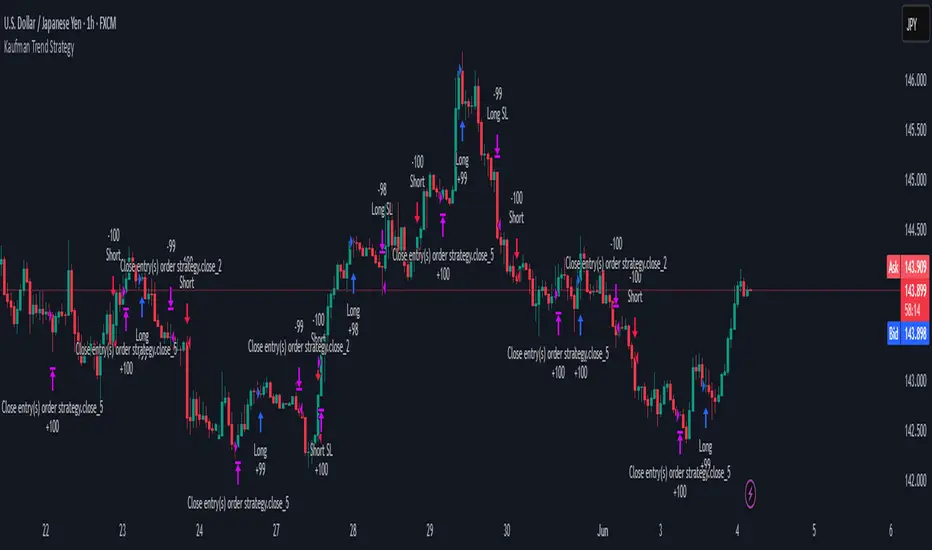
Strategia

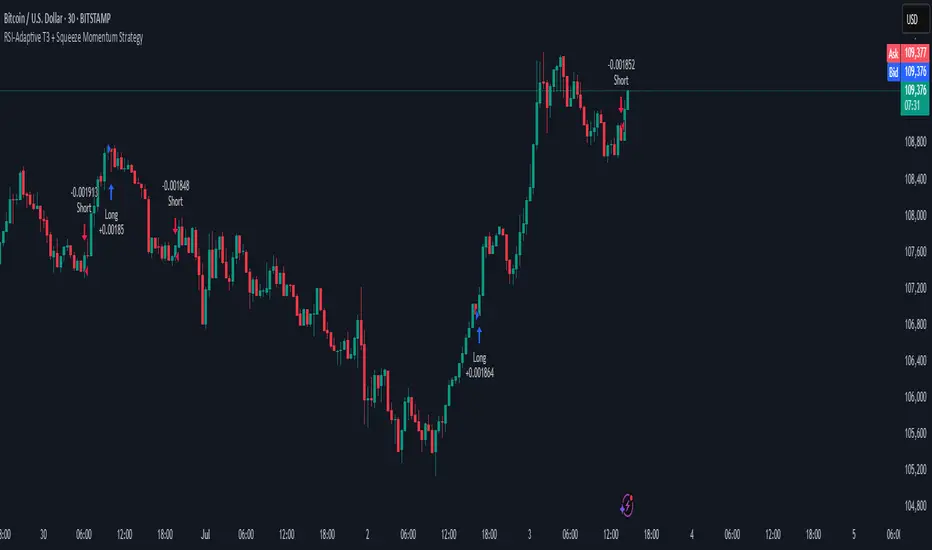
Alpha S/R Channel StrategyAlpha S/R Channel Strategy (ASRC)
Mean-reversion strategy trading pullbacks to a dynamic Higher Timeframe EMA channel. Confirms exhaustion via Engulfing & Pin Bar patterns, with Pin+Engulf combo overriding trend filters to capture institutional liquidity grabs. Features optional RSI, BB width, and inverted Squeeze Momentum filters. Includes adaptive position sizing, partial TP, breakeven stops, session trade limits, no-trade windows, day/weekend close, and Friday trading control.
📌 Strategy Overview
Alpha S/R Channel Strategy is a dual‑timeframe mean‑reversion strategy that identifies high‑probability reversal setups by combining a dynamic channel derived from a Higher Timeframe EMA with high‑conviction candlestick patterns (Engulfing and Pin Bar).
The strategy waits for price to retrace to a dynamic value area (the channel) and confirms exhaustion through candlestick patterns before entering—capturing pullbacks within the prevailing trend while avoiding counter‑trend trades.
🧠 Unique Edge – Why This Mashup Works
Most trend‑following strategies chase breakouts and get caught in false moves. Most engulfing strategies ignore the bigger picture and enter too early. This strategy solves both problems by combining these components in a specific sequence:
1. Dynamic EMA Channel (The Value Area)
Instead of using static support/resistance, the strategy constructs a dynamic channel around a Higher Timeframe EMA. The channel width adapts to volatility using three modes:
- Percentage – width as % of current price.(price * (channelWidthPct / 100) )
- ATR Multiplier – width based on ATR from the Higher Timeframe.
- Fixed – static price distance.
Why this matters: The HTF EMA represents the "fair value" or equilibrium price. When price pulls back to this zone, it's statistically more likely to resume the trend rather than reverse.
-------------------------------------------------------------------
2. Channel Break + Candlestick Confirmation (The Trigger)
The strategy enters only when price returns to the channel AND shows exhaustion:
- Bullish Engulfing – Current green candle engulfs previous red/small green candle
- Bearish Engulfing – Current red candle engulfs previous green/small red candle
- Pin Bar + Engulfing Combo – Pin bar sweeps recent high/low and is followed by an engulfing pattern
Why this matters: The channel provides the context (where price should reverse). The candlestick patterns provide the confirmation (that reversal is actually happening). Using both drastically reduces false signals.
-------------------------------------------------------------------
3. Optional Multi‑Layer Filters (The Quality Control)
The strategy includes configurable filters that can be enabled/disabled:
1- EMA Lower TF – Ensures micro‑trend alignment (longs above EMA, shorts below)
However, there is a critical override:
🔄 Pin Bar + Engulfing Combo OVERRIDES the EMA Confirmation
When a Pin Bar sweeps the N‑bar high/low (proving a breakout attempt failed) and is immediately followed by an Engulfing pattern on the next candle, this combo represents a "double confirmation" of exhaustion that bypasses the EMA filter.
Why this is a breakthrough:
Strong institutional reversals (liquidity grabs) often happen against the short‑term EMA trend. A pure trend‑following strategy with a strict EMA filter would miss these reversals because price is moving against the EMA.
2- Higher Timeframe EMA – Ensures long‑term trend alignment
This acts as a "trend filter on top of the trend filter" – preventing entries that go against the even larger market structure. Users can select a separate timeframe (e.g., 1H) with its own EMA length for additional confirmation.
3- RSI – Prevents buying above 70 and selling below 30
4- Bollinger Bands – Blocks entries during low volatility (sideways markets)
5- Squeeze Momentum – This strategy uses an inverted Squeeze Momentum logic:
"val < 0 → Longs allowed, Shorts blocked"
"val > 0 → Shorts allowed, Longs blocked"
"val == 0 → Both allowed"
This inversion is intentional. The strategy is mean‑reversion based—it waits for momentum to become overextended and then trades against that momentum
These filters are optional because different assets and market conditions require different levels of confirmation. The user has full control.
-------------------------------------------------------------------
4. Comprehensive Risk Management
The strategy includes:
- Position Sizing – Fixed percentage of equity per trade (separate for first and second entry)
- Pyramiding – Allows up to 2 positions in the same direction (second trade uses lower risk)
- Multiple SL Options – Low-High, Swing high/low, Channel, Fixed distance
- Trade Counter Reset – Resets at session starts for scalping timeframes, daily for swing
- No‑Trade Windows – Blocks entries during end‑of‑day volatility (active only for TF ≤ 15m)
- Day/Week End Closing – Closes positions before gaps (configurable by timeframe)
- Partial Take Profit – Closes a configurable percentage (default: 50%) at a specified R:R ratio (default: 1:2), allowing the remainder to run to the full target (default: 1:3)
- Breakeven Stop – Optionally moves the stop loss to breakeven when the first TP level is reached, protecting the remaining position from turning into a loss
Why this matters: The risk controls ensure survivability across different market conditions. Also Breakeven protection reduces the risk of winning trades turning into losers.
-------------------------------------------------------------------
📊 How It Works
1. Dynamic Channel Calculation
The strategy constructs a channel around an Exponential Moving Average (EMA) from a selected Higher Timeframe:
- EMA – Calculated on the Higher Timeframe
- Channel Width – Adaptive based on volatility (Percentage, ATR, or Fixed)
- Upper Band = EMA + (Width / 2)
- Lower Band = EMA - (Width / 2)
Channel Width Modes:
- Percentage – Width = Price × (User‑defined %)
- ATR Multiplier – Width = ATR(14) × Multiplier
- Fixed – Width = Static distance
-------------------------------------------------------------------
2. Entry Signal Detection
Trades are executed on the Lower Timeframe (default: 5m) when all conditions are met:
Pattern Requirements (One of the following):
- Bullish Engulfing: Current green candle completely engulfs previous bearish or small green candle
- Bearish Engulfing: Current red candle completely engulfs previous bullish or small red candle
- Pin Bar + Engulfing Combo: Pin bar sweeps recent high/low AND is followed by engulfing pattern (Overrides LTF EMA)
# Engulfing Filters:
Body Only – Only bodies must engulf (not full range)
Min/Max Range – Configurable via Percentage, ATR, or Fixed
Gap Allowance – Controls how much gap is allowed in the wrong direction
Previous Range % – Limits the size of the prior candle when it's in the same color
# Pin Bar Detection:
- Wick/Body Ratio (default: 3.0) – Wick must be 3× larger than body
- Max Body/Range (default: 0.20) – Body must be ≤20% of total range
- Min Wick/Range (default: 0.70) – Wick must be ≥70% of total range
- Sweep Lookback (default: 10 bars) – Pin bar must sweep a recent high/low
Min Pin Bar Range % – Pin bar must meet a minimum size threshold
# Channel Proximity:
Price must be within the channel boundaries (open inside)
-------------------------------------------------------------------
3. Confirmation Filters (All Optional)
- Lower Timeframe EMA : Longs require price > EMA; Shorts require price < EMA (overridden by Pin+Engulf combo)
- Higher Timeframe EMA : Ensures long‑term trend alignment (longs above HTF EMA, shorts below)
- RSI : Prevents longs above 70; Prevents shorts below 30
- Bollinger Bands : Blocks entries when BB width < threshold (low volatility)
- Squeeze Momentum : Ensures momentum matches trade direction (inverted logic)
-------------------------------------------------------------------
4. Risk & Position Management
# Position Sizing:
- First Trade – Fixed % of equity (default: 2%)
- Second Trade – Separate % of equity (default: 1%)
- Position size = (Account Risk) / (Entry – SL Distance)
# Friday Trading:
- Allow Friday Trading (default: Disabled) – When disabled, no new trades will be opened on Fridays. Existing positions are not affected. This helps avoid weekend gap risk as markets close for the week.
# Stop‑Loss Options:
1- Low-High : Entry bar low/high ± buffer
2- Swing high/low : N-bar low/high ± buffer
3- Channel : Channel band ± buffer
4- Fixed distance : Fixed price distance from entry
# Take Profit:
- Main R:R ratio (default: 1:3)
- Separate R:R for second trade (default: 1:3)
# Trade Counter Reset:
TF ≤ 15m – Resets at Asia (20:00 NY), London (03:30 NY), New York (09:30 NY)
TF > 15m – Resets once per day at session start
# No‑Trade Window:
- Active only for TF ≤ 15m (16:45–19:05 NY time)
- Protects against end‑of‑day volatility spikes
# Close All Positions:
- TF ≤ 15m – Can close at day end and/or week end (configurable)
- 15m < TF ≤ 240m – Week end only
- TF > 240m – Feature disabled
# Entry Spacing:
- Minimum Bars Between Entries (default: 4) – Prevents multiple entries on the same bar or too close together, reducing the impact of whipsaw on tightly clustered signals
⚙️ Default Settings – Optimized for XAUUSD (Gold)
All default values have been specifically calibrated for Gold's typical volatility and intraday structure.
Setting \ Default \ Why This Works for Gold
-----------------------------------------------------------------------------------
Higher Timeframe \ 15m \ Gold's intraday rhythm operates on 15‑minute cycles. This timeframe captures the balance between institutional order flow and retail noise.
-----------------------------------------------------------------------------------
EMA Length \ 36 \ approximately one full trading session. This captures the dominant intraday trend without excessive lag.
-----------------------------------------------------------------------------------
Channel Width Mode \ Percentage \ Gold's price levels change over time. Percentage mode ensures the channel scales with price, maintaining consistent relative width regardless of Gold's price level.
-----------------------------------------------------------------------------------
Channel Width \ 0.35% \ Gold's daily range averages $30–$100. At current prices, 0.35% = approximately $113–$16. This width captures ~70% of Gold's daily volatility, creating a meaningful "value zone" that filters noise while remaining relevant.
-----------------------------------------------------------------------------------
Lower Timeframe \ 5m \ Fast enough to capture entry signals within the same session, slow enough to filter out micro‑noise. 5m is Gold's "sweet spot" for intraday entries.
-----------------------------------------------------------------------------------
Engulfing Mode \ Percentage \ Adapts to Gold's volatility. As Gold's price moves, the required engulfing range scales proportionally—ensuring consistent pattern quality.
-----------------------------------------------------------------------------------
Engulfing Min Range \ 0.098% \ At Gold's current price3000-5000, this ≈ $3.0–$5.0. Anything smaller is just market noise, not a meaningful reversal signal.
-----------------------------------------------------------------------------------
Engulfing Max Range \ 0.550% \ At Gold's current price, this ≈ $20–$25. Larger candles are often blow‑off spikes driven by news —they tend to reverse violently, making them poor entry points.
-----------------------------------------------------------------------------------
Previous Range % \ 0.60 \ Allows the prior candle to be up to 60% of the engulfing candle's range. This is Gold's "consolidation before reversal" pattern—a small same‑color candle before a large reversal candle.
-----------------------------------------------------------------------------------
Gap Allowance \ 250 ticks \ Gold's typical spread and gap behavior. (250 ticks = $0.250 However, tick values vary between brokers), which accommodates normal gaps without allowing extreme invalid gaps.
-----------------------------------------------------------------------------------
Pin Bar Sweep \ 10 bars \ On a 5m chart, 10 bars = 50 minutes. Gold's liquidity grabs often occur within a 30–60 minute window. 10 bars captures these recent liquidity zones without looking too far back.
-----------------------------------------------------------------------------------
Pin Bar Range % \ 0.70 \ Requires the pin bar(high-low) to be at least 70% of the minimum engulfing range. This ensures the pin bar has enough size to be meaningful—rejecting tiny pin bars that lack conviction.
-----------------------------------------------------------------------------------
Risk per Trade (1st) \ 2% \ Gold experiences 3–5 trade losing streaks regularly. 2% risk ensures that a typical losing streak results in only 6–10% drawdown—recoverable with a few winning trades.
-----------------------------------------------------------------------------------
Risk per Trade (2nd) \ 1% \ When pyramiding, total exposure increases. 1% on the second trade limits worst‑case loss to -3% total (2% + 1%), protecting the account during false reversals.
-----------------------------------------------------------------------------------
Risk:Reward \ 1:3 \ Gold routinely moves 1.5–2× its ATR in a single directional push. A 1:3 target (e.g., $15 on a $5 stop) is well within Gold's typical daily range—achievable without being overly ambitious.
-----------------------------------------------------------------------------------
Stop‑Loss Reference \ Channel \ Aligns the stop with the value area. If price breaks beyond the channel, the mean‑reversion thesis is invalidated. This is the most logical stop placement for this strategy.
-----------------------------------------------------------------------------------
Stop‑Loss Buffer \ 500 ticks \ 500 ticks = ($0.50 ) on Gold. However, tick values vary between brokers so The table on chart will display and show the calculated dollar value. This provides a safety buffer against spread, slippage, and normal wicks—preventing premature stops while keeping the stop within the value area.
-----------------------------------------------------------------------------------
Partial TP & Breakeven \ Disabled (50%, 1:2) \ Optional features that allow locking in partial profits and protecting positions once they move in your favor. Recommended to enable after forward testing.
-----------------------------------------------------------------------------------
No‑Trade Window \ Enabled \ 16:45–19:05 NY time captures the end‑of‑day volatility spike. Gold often experiences erratic moves during this period as institutional traders close positions.
-----------------------------------------------------------------------------------
Day End Close \ Enabled \ Gold gaps frequently at the daily open (5:00 PM NY). Closing before day end avoids these gaps, which can easily stop out tight positions.
-----------------------------------------------------------------------------------
Week End Close \ Enabled \ Gold is highly sensitive to weekend news (geopolitics, central banks). Gaps of $20–$50+ are common at Sunday open. Closing before Friday close is essential.
-----------------------------------------------------------------------------------
EMA Lower TF \ Enabled \ Ensures entries align with the 5m micro‑trend. However, the Pin+Engulf combo overrides this filter to capture institutional reversals against the trend.
-----------------------------------------------------------------------------------
Higher TF EMA \ Enabled (1H, 55) \ Provides an additional layer of trend confirmation at the macro level. The 1H 55‑EMA acts as a reliable gauge of the broader intraday trend, preventing entries against strong momentum.
-----------------------------------------------------------------------------------
RSI \ Enabled length(14) \ Prevents buying when Gold is overbought (RSI > 70) and selling when oversold (RSI < 30). Gold's sharp spikes often create extreme RSI readings—this filter avoids chasing exhausted moves.
-----------------------------------------------------------------------------------
Bollinger Bands \ Enabled \ locks entries during low volatility (BB width < 0.002). Gold sometimes enters tight consolidation ranges (BB width < 0.002) where engulfing patterns fail. This filter avoids trading in these conditions.
-----------------------------------------------------------------------------------
Squeeze Momentum \ Enabled \ This is inverted from standard SQZMOM. Gold's momentum often overshoots before reversing. By fading the extreme (longs when val < 0, shorts when val > 0), the strategy captures the reversal rather than chasing the continuation.
-----------------------------------------------------------------------------------
# Important Notes on Backtest Realism
- Commission – Most ECN/raw-spread brokers charge $3.00–$3.50 per side (round-turn commission of $6.00- $7.00) for 1 standard lot (100 oz) of XAUUSD. Standard accounts usually build the fee into a wider spread instead of charging a separate cash. This strategy deducts $3.50 per entry and $3.50 per exit ($0.035 × 100 oz)round-turn commission of $7.00. Adjust this to match your broker's exact fees.
- 4 ticks Slippage – For XAUUSD on OANDA, 1 tick = $0.001** per ounce (3 decimal places). 4 ticks = **$0.004 per ounce. Adjust this value if your broker quotes XAUUSD with different decimal precision (e.g., 2 decimal = $0.01 per tick).
Always adjust the commission value to your broker's exact fee structure before relying on the results.
"A backtest without realistic commission and slippage is a fantasy. A backtest with realistic commission and slippage is a truthful reflection of what you can expect when trading live."
-------------------------------------------------------------------
📊 Chart Display
Channel – Upper/Lower bands with a semi‑transparent fill (red zone), representing the value area
EMA Lower TF – Green EMA on the lower timeframe for confirmation
HTF EMA Filter – Red EMA line showing the additional trend filter (plotted on all timeframes ≤ its TF)
Info Table – Shows Market Status, EMA confirmations, Channel Width, Engulfing ranges, SL settings,
Filters, No‑Trade Window status, Session Close status
Signal Arrows – Green arrow pointing up (below bar) for Long entries, Red arrow pointing down (above bar) for Short entries
Historical Trades – Configurable number of past trades to display on the chart (default: 111, max: 125). Adjust this to optimize chart performance while keeping sufficient trade history for visual analysis.
Reset Signal – Arrow marker (grey) indicating when the trade counter resets at session starts (Asia, London, New York for TF ≤ 15m, or daily for larger TFs)
Background Colors – red for No‑Trade Window, Gray/White for Session Close
UI Note
# When you adjust any setting in the Inputs tab (Channel Width, Engulfing Min/Max, Previous Range, SL Buffer, etc.), the values displayed in the info table update automatically in real‑time.
This allows you to:
- See the impact of your changes immediately
- Verify the actual dollar values of your settings at current price levels
- Fine‑tune parameters without switching between tabs
Example: If you change the Channel Width from 0.35% to 0.50%, the info table will instantly show the new width in dollars (e.g., $8.50 → $12.00).
# Inputs are hidden from the status line to keep the chart clean. All settings (zones, EMAs, risk, patterns) remain fully adjustable in Settings → Inputs tab.
-------------------------------------------------------------------
📌 In Summary:
This is not a random collection of indicators.
- The HTF EMA Channel provides the structural context – a dynamic value area that adapts to volatility.
- The Engulfing/Pin Bar patterns provide the high‑conviction trigger – exhaustion confirmation.
- The EMA Override provides the institutional edge – capturing liquidity grabs that standard EMA‑based strategies miss.
- The Optional Filters provide the quality control – reducing false signals.
- The Risk Management provides the survivability – realistic position sizing and stops.
Each component exists specifically to compensate for a flaw in the others. This interdependency is what makes the strategy original, robust,
Author: Awab_Hassan
Strategia

Triple Supertrend Confluence [MarkitTick]💡 A triple-layer Supertrend confluence system that fuses adaptive volatility bands, multi-timeframe bias, momentum strength, volume conviction, and a cooldown throttle into a single, high-confidence trend signal — then automates the entire trade plan around it with ATR-scaled stop-loss and three staged take-profit levels.
✨ Originality and Utility
Most Supertrend implementations on the platform are single-instance: one ATR period, one multiplier, one line. This script restructures the classic Supertrend into a voting system. Three independently parameterized Supertrend instances (a primary "core" trend and two auxiliary "fast" and "slow" trackers) are calculated in parallel from the same underlying price source, and a signal is only treated as valid when a configurable number of these instances agree on direction. This confluence layer is what separates the tool from a standard Supertrend plot — it is designed to filter out the single biggest weakness of trend-following overlays: getting whipsawed by a solitary indicator flipping on marginal price action.
On top of the consensus layer, the script lets traders stack up to four independent, optional confirmation filters (trend strength via ADX/DMI, higher-timeframe directional bias, relative volume, and a bar-count cooldown) before a signal is considered "confirmed." Each filter can be toggled independently, so the tool scales from a bare-bones single Supertrend up to a fully gated, multi-condition trend-following system. A real-time dashboard keeps every filter's pass/fail state visible at a glance, and an automated trade-planning layer converts each confirmed flip into a structured entry/stop/three-tier-target plan, plotted directly on the chart and exposed through webhook-ready JSON alert payloads.
🔬 Methodology and Concepts
• Core Supertrend Engine
The underlying trend engine follows the standard Supertrend construction: an ATR-derived envelope is built around a price source, with an upper band (source plus a multiple of ATR) and a lower band (source minus a multiple of ATR). These bands are "ratcheted" bar to bar — the lower band can only rise or reset if price closes below the prior lower band, and the upper band can only fall or reset if price closes above the prior upper band. The active trend line switches between the lower band (uptrend) and upper band (downtrend) whenever price closes through the opposite band, producing the familiar stepped Supertrend line. This engine is reused three times with different parameters to build the confluence system described below.
• Adaptive Source Smoothing
Rather than feeding raw HL2 price directly into the Supertrend engine, the script offers eight optional smoothing methods to pre-condition the source: Simple, Exponential, and Wilder's Moving Averages; a Double-Pass Weighted Moving Average; a Triple-Pass Volume-Weighted Moving Average; a Hull Moving Average; a custom slope-adjusted average (LLAMA) that blends a simple mean with a linear slope projection over the lookback window; and a single-state Kalman Filter that recursively updates an estimate and its error covariance bar by bar to produce a noise-adaptive average. Smoothing the source before it reaches the Supertrend calculation reduces false flips caused by single-bar noise spikes, at the cost of some responsiveness.
• Adaptive Volatility Factor
Instead of using a fixed ATR multiplier for the core Supertrend band width, the script can compute a percentile rank of current ATR against its own recent history (a lookback window of your choosing). This rank is then mapped linearly onto a user-defined minimum/maximum multiplier range. In practice, this means the band automatically widens during historically high-volatility regimes (reducing whipsaw) and tightens during historically low-volatility regimes (increasing sensitivity), rather than using one static multiplier across all conditions.
• Triple Consensus Voting
Two additional Supertrend instances — a faster-reacting pair (shorter ATR length, smaller multiplier) and a slower-reacting pair (longer ATR length, larger multiplier) — run alongside the core engine on the same smoothed source. When consensus mode is enabled, a signal is only marked confirmed if at least two of the three instances (including the core) agree on direction. This is a simple majority-vote filter designed to suppress signals that are specific to one particular band setting rather than representative of the broader trend structure.
• ADX / DMI Trend Strength Filter
An optional Average Directional Index filter, calculated using Wilder's Directional Movement methodology, requires ADX to be at or above a user-defined threshold before a flip is confirmed. This is a standard technique for distinguishing genuine directional moves from choppy, non-trending price action, since Supertrend-style systems are known to underperform in low-ADX ranging conditions.
• Higher-Timeframe Bias Filter
An optional filter pulls the trend direction of the same Supertrend engine calculated on a higher, user-selected timeframe, and only confirms a signal if it aligns with that higher-timeframe bias. The higher-timeframe value is read from the prior, fully closed bar on that timeframe to avoid any intra-bar recalculation, ensuring the filter reflects only confirmed historical structure rather than an in-progress bar.
• Volume Confirmation Filter
An optional filter compares current bar volume against its own moving average, requiring volume to exceed the average by a user-defined multiple before a signal is confirmed. This is a simple conviction check: trend changes accompanied by above-average participation are treated as more reliable than those occurring on thin volume.
• Cooldown Guard
An optional bar-count throttle prevents a new confirmed signal in the same direction as a recent prior signal if too few bars have elapsed since that prior signal within the same directional segment, reducing rapid re-signaling during choppy transition periods.
• Confirmation Lag Notice
All confirmation logic (consensus vote, ADX filter, HTF bias, volume filter, cooldown guard) and the resulting BULL/BEAR labels, alerts, and trade-level plotting are evaluated strictly on confirmed, closed bars using barstate.isconfirmed. This means every signal displayed or alerted is final and will not repaint once printed. However, users should be aware that a signal is only confirmed one bar after the actual Supertrend flip occurs, since the confirmation checks (particularly the higher-timeframe bias filter) require a fully closed bar to evaluate safely. This introduces a small, deliberate one-bar lag between the raw trend flip and the confirmed signal in exchange for eliminating repainting.
• Automated Trade Level Engine
On every confirmed flip, the script calculates a full trade plan from the entry price (the confirmed close), an ATR-scaled stop-loss (a user-defined multiple of ATR away from entry), and three take-profit levels defined as user-configurable risk:reward multiples of the initial stop distance. These levels are drawn as extending lines and labels, with shaded risk and reward zones between them, and refresh automatically on each new confirmed signal unless the signal is manually locked.
🎨 Visual Guide
Stepped trend line (color reflects the Up/Down Color inputs): traces the active Supertrend band. It plots along the lower band while price is in an uptrend and the upper band while price is in a downtrend.
Muted/gray trend line: when a filter is active but not yet satisfied, the trend line temporarily switches to the Unconfirmed Color to signal that the raw trend has flipped but confirmation is still pending.
Soft background fill (Up Fill / Down Fill colors): a translucent shaded region behind price reinforcing the current trend direction.
Heatmap candles: when enabled, candle bodies and wicks are recolored using the Heatmap Up/Down colors to match the current trend direction, offering an at-a-glance visual of trend state independent of the line itself.
"BULL" / "BEAR" labels: printed below or above the bar respectively, only on confirmed flips that pass every active filter.
Gray cooldown background: a shaded band that appears across the chart while the Cooldown Guard is actively suppressing new signals.
Trade level lines: a solid red Stop-Loss line, a dashed blue Entry line, and three dashed teal Take-Profit lines (TP1 lightest, TP3 most opaque), each extending to the right of the current bar with a price label attached, shown only when Show Trade Levels is enabled.
Shaded risk/reward zones: a light red fill between Stop-Loss and Entry (the risk zone) and a light teal fill between Entry and TP3 (the reward zone).
On-chart dashboard table: displays symbol/timeframe, Lock status, current Trend direction, Confirmed state, ADX value with a color-coded strength percentage, active Adaptive Filter type, Consensus vote count, HTF Bias direction and pass/fail, Volume filter pass/fail, and remaining Cooldown bars — all updating on the most recent bar.
📖 How to Use
Use the stepped trend line and background fill as the primary trend read: price above the line with an up-colored fill suggests an uptrend context; price below with a down-colored fill suggests a downtrend context.
Treat a "BULL" or "BEAR" label as the actionable signal rather than the raw line flip — labels only appear once every enabled filter has passed, meaning the signal has already been screened for trend strength, higher-timeframe alignment, volume conviction, and cooldown status.
If the trend line is showing the Unconfirmed Color, the underlying trend has technically flipped but is still waiting on one or more active filters — treat this as a "watch" state rather than a trade trigger.
Check the dashboard on each new bar to see exactly which filter(s) are passing or failing before a signal can confirm; this is useful for understanding why an expected signal did not appear.
When Show Trade Levels is enabled, use the plotted Stop-Loss, Entry, and TP1/TP2/TP3 lines as a starting reference for structuring a trade around a confirmed signal — adjust position sizing and targets to your own risk tolerance.
Enable Lock Signal to freeze the current trade-level plot in place (useful for screenshots or reviewing a specific setup) without it being overwritten by a new signal.
The JSON alert payloads are formatted for direct use in webhook-based automation, carrying action, ticker, timeframe, direction, and price fields for long entries, short entries, and their corresponding close-position triggers.
⚙️ Inputs and Settings
ATR Len / Factor: the ATR lookback and multiplier for the core Supertrend engine; higher Factor values produce a looser band and fewer, larger-magnitude signals.
Adaptive Factor (and Min/Max/Rank Len): when enabled, replaces the fixed Factor with a volatility-percentile-driven multiplier that ranges between Factor Min and Factor Max based on where current ATR sits within its own recent history.
Use ADX Filter / ADX Threshold / ADX Length: gates signal confirmation on trend strength; raise the threshold to demand stronger directional conviction before confirming.
Adaptive Filter / Adaptive Filter Len: selects the source-smoothing method applied before the Supertrend calculation, and its lookback length.
Use HTF Confluence / HTF: requires the selected higher timeframe's own Supertrend direction to agree before confirming a signal.
Use Volume Filter / Volume Avg Len / Volume Mult: requires current volume to exceed its moving average by the given multiple before confirming.
Use Cooldown Guard / Cooldown Bars: suppresses new same-direction signals for a set number of bars following a recent prior signal in the same directional segment.
Use Triple Consensus / Fast Factor / Fast ATR Len / Slow Factor / Slow ATR Len: enables the majority-vote filter and configures the auxiliary fast and slow Supertrend instances used to build consensus.
Lock Signal: freezes the currently plotted trade levels, preventing them from updating on a new signal.
Show Trade Levels: toggles the automated Entry/SL/TP1-3 line and label plotting.
SL ATR Mult: the ATR multiple used to place the stop-loss distance from entry.
TP1/TP2/TP3 R:R: the risk:reward multiples used to place each take-profit level relative to the stop distance.
Heatmap Candles / BULL-BEAR Labels / Show Dashboard / Position: visual display toggles and dashboard placement.
Long/Short/Close Long/Close Short Action: customizable string values embedded in the JSON alert payload's "action" field, for mapping to specific webhook automation commands.
🔍 Deconstruction of the Underlying Scientific and Academic Framework
• Volatility-Based Trend Following (Supertrend / ATR Envelopes)
The core engine descends from the broader family of volatility-adjusted trend-following bands, which use Average True Range (a measure of typical price movement magnitude popularized by J. Welles Wilder) to scale a trailing stop-and-reverse line to prevailing market volatility rather than a fixed price distance. The ratcheting band logic ensures the line never moves against the prevailing trend, which is the defining mechanical property of a trailing-stop-style trend system as opposed to a simple moving average crossover.
• Percentile Ranking for Regime Adaptation
The adaptive factor mechanism applies percentile rank normalization — expressing current ATR as its standing relative to a distribution of its own recent historical values — as a way of contextualizing volatility without relying on a fixed absolute threshold, which allows the same logic to be meaningfully applied across instruments and timeframes with very different baseline volatility levels.
• Ensemble / Majority-Vote Filtering
The Triple Consensus mechanism is a straightforward application of ensemble logic: combining multiple independent estimators (in this case, differently parameterized instances of the same underlying model) and requiring agreement among a majority before acting. This is a well-established technique for variance reduction in signal processing and forecasting contexts, on the premise that independent estimators are less likely to agree by chance during noise-driven, non-trending conditions than during genuine directional moves.
• Wilder's Directional Movement / ADX
The ADX filter is drawn directly from J. Welles Wilder's Directional Movement System, which decomposes price movement into positive and negative directional components and derives a smoothed index (ADX) representing trend strength independent of direction. ADX below common threshold levels is widely associated with range-bound, non-trending conditions in technical analysis literature.
• Recursive State Estimation (Kalman Filtering)
The optional Kalman Filter smoothing method applies a simplified single-state form of the Kalman recursive estimation framework from control theory and signal processing, in which a running estimate is continuously updated by weighting new observations against the estimate's own error covariance, producing a smoothing average that adapts its responsiveness based on recent prediction error rather than using a fixed lookback window.
• Slope-Adjusted Trend Extrapolation (LLAMA)
The LLAMA smoothing option combines a simple arithmetic mean with a linear slope term derived from the change in price over the lookback window, projecting the average forward along the recent trend direction — a lightweight application of linear extrapolation principles used to reduce the inherent lag of simple averaging methods.
• Volume as a Conviction Proxy
The volume filter reflects the broader technical-analysis principle that price movements accompanied by above-average participation carry more informational weight than those on thin volume, a concept with roots in classical volume-price analysis dating back to early technical analysis literature (e.g., Dow Theory's treatment of volume as a confirming factor).
⚠️ Disclaimer
All provided scripts and indicators are strictly for educational exploration and must not be interpreted as financial advice or a recommendation to execute trades. We expressly disclaim all liability for any financial losses or damages that may result, directly or indirectly, from the reliance on or application of these tools. Market participation carries inherent risk where past performance never guarantees future returns, leaving all investment decisions and due diligence solely at your own discretion. Indicatore

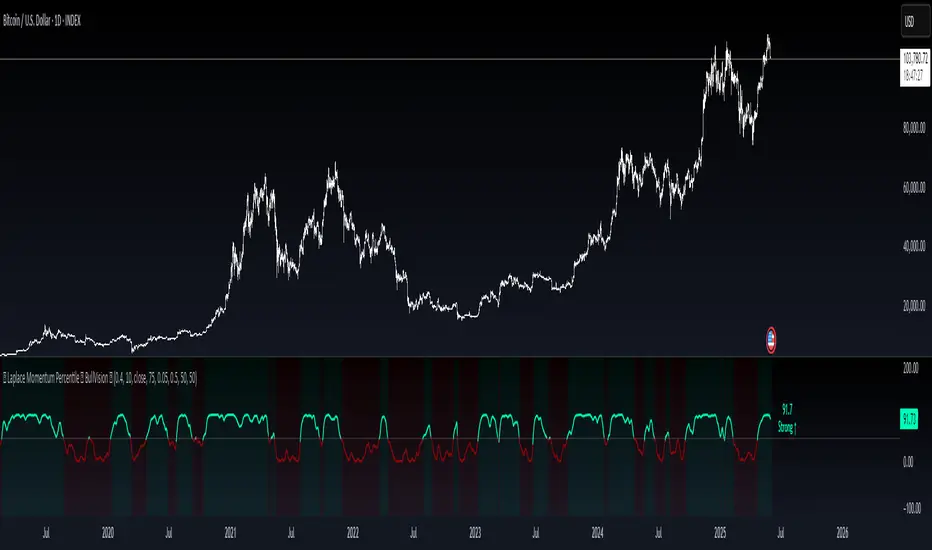
Liquidity Trend Heatmap [BigBeluga]🔵 OVERVIEW
The Liquidity Trend Heatmap is a professional-grade volume analysis tool that maps market liquidity directly onto your price chart. By combining a trend-following baseline with a high-resolution volume-at-price heatmap, it helps traders instantly visualize where the market's "heavy" trading zones are located relative to the current trend.
🔵 FEATURES
The indicator utilizes a sophisticated volume-distribution engine to provide actionable market intelligence:
1 — Dynamic Liquidity Heatmap
Multi-Node Distribution: The indicator divides the recent price range into a 26-level grid, calculating the cumulative volume traded at each level over your defined Lookback Period .
Visual Heatmap Nodes: Liquidity is displayed as shapes (Squares, Circles, etc.) that shift color and intensity based on the volume processed at that price.
Normalized Intensity: Nodes appear more vivid based on their volume relative to the Point of Control (POC), ensuring you only focus on the most significant liquidity zones.
2 — Institutional Point of Control (POC) Tracker
Automated POC Detection: The system identifies the specific price level with the highest volume accumulation, marking it as the market’s primary liquidity magnet.
Real-Time Metrics: A dedicated POC label on the far right of your chart provides the exact price and volume traded at the POC, keeping your focus on the most critical level.
3 — Trend-Following Dashboard
Trend Baseline: Includes a customizable moving average ( Trend Length ) that acts as a structural midline. This midline automatically updates color to indicate whether the current environment is Bullish or Bearish.
Information Dashboard: A clean, configurable table at the top-right provides instant updates on the current trend status, POC price, and total POC volume without cluttering your workspace.
🔵 HOW TO USE
This tool is designed to identify "smart money" zones and potential mean-reversion levels:
Identify Liquidity Magnets: Use the POC level as a primary target or support/resistance level. High-volume nodes often act as magnets for price action.
Confirm Trend: Use the Trend Line and dashboard status to ensure your liquidity-based trades are aligned with the prevailing market trend.
Filter Weak Levels: Adjust the Heatmap Threshold % to hide low-volume levels. This cleans up your chart and leaves only the most relevant, high-conviction liquidity zones visible.
🔵 NOTES
Why this implementation is unique:
It combines complex volume-profile math with a lightweight, user-friendly visual interface, making it suitable for both scalpers and swing traders.
The "future-extending" heatmap nodes visualize expected liquidity distribution into the immediate future, helping you anticipate price behavior before it happens.
The system is highly customizable, allowing you to toggle the trend line, adjust shape types, and change heatmap thresholds to suit your specific trading style.
Indicatore

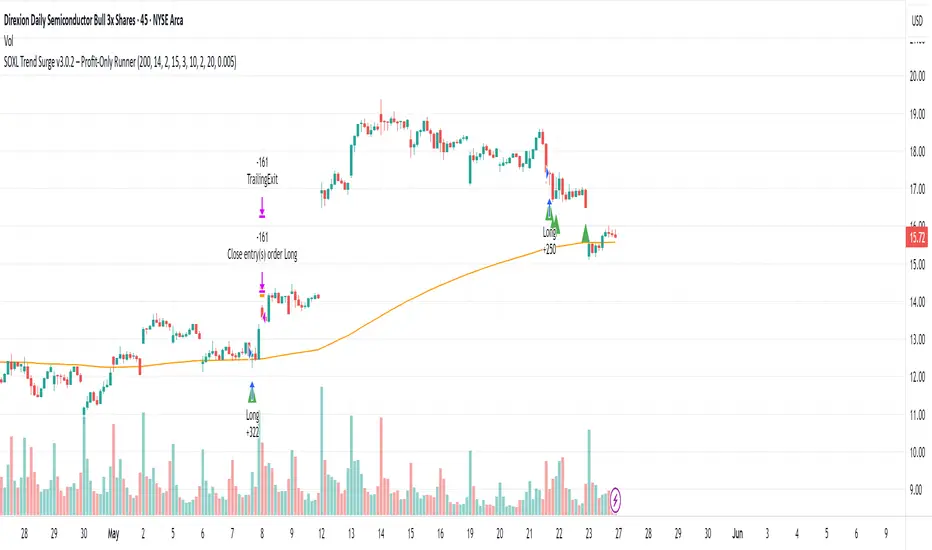
Hybrid Breakout | VCP-Inspired TrendTrend Squeeze Breakout
Trend Squeeze Breakout is a trend-following momentum strategy designed to identify stocks in strong established uptrends that are consolidating into relatively tight trading ranges before attempting a breakout.
The strategy combines a simplified Minervini-style trend template, volatility contraction, volume confirmation, and stop-entry breakout execution. It is designed primarily for swing trading and is intended to participate in strong upward price expansions while filtering out many breakouts occurring in weak or declining trends.
Strategy Explanation
The strategy follows a simple sequence:
Identify a strong uptrend
A long setup requires:
Price above the 50-period SMA
50 SMA above the 150 SMA
150 SMA above the 200 SMA
200 SMA rising
200 SMA continuing to rise over the selected lookback period
50 SMA not declining
This establishes that the stock is already in a structurally bullish environment before considering an entry.
Identify a volatility contraction
The strategy looks for periods where recent price movement has become unusually tight.
It evaluates both:
Recent high-low range
Recent closing-price range
The high-low range is also compared with its historical percentile over the selected lookback period. This allows the strategy to identify relatively quiet consolidation periods rather than relying on a fixed volatility threshold alone.
Confirm volume
When the volume filter is enabled, breakout volume must exceed the moving-average volume baseline by the selected multiplier.
The default requirement is:
Volume > 20-period average volume × 1.2
This is intended to provide additional confirmation that the breakout is supported by meaningful participation.
Enter on a breakout
When the trend, contraction, and volume conditions are satisfied, the strategy places a stop-entry order above the recent high.
The default breakout lookback is 3 bars, allowing the strategy to attempt to enter as price moves through the recent consolidation high rather than simply buying while the stock remains inside the range.
Manage the position
Positions use tiered profit-taking:
25% closed at +10%
50% closed at +20%
Remaining position closed at +30%
Default stop loss at -8%
This allows the strategy to realize some profits during the initial move while maintaining exposure to larger momentum extensions.
Features
Trend Filter — 50/150/200 SMA bullish alignment
Long-Term Trend Confirmation — Requires the 200 SMA to be rising
Volatility Squeeze Detection — Identifies unusually tight recent ranges
Range Percentile Filter — Compares current volatility with historical volatility
Close-Range Filter — Detects tight price consolidation
Volume Confirmation — Optional volume expansion requirement
Stop-Entry Breakout — Enters only when price breaks the recent high
Tiered Profit Taking — Three configurable profit targets
Percentage-Based Stop Loss — Adjustable downside protection
Date Filter — Allows users to restrict backtests to a specific period
Configurable Parameters — Trend, volatility, volume, breakout, and risk settings can all be adjusted
Tips for Use
Use on liquid stocks
The strategy is generally better suited to liquid stocks and ETFs with sufficient trading volume. Extremely illiquid securities can produce unrealistic backtest results because of spreads and execution differences.
Start with daily charts
The strategy is particularly suited to identifying multi-day or multi-week momentum breakouts. Daily charts are a good starting point when evaluating the strategy.
Avoid optimizing every parameter
The many adjustable parameters make it possible to overfit the strategy to a particular stock or historical period. Test parameter changes across multiple securities and different market environments rather than optimizing exclusively for one chart.
Treat the volume filter as confirmation, not a guarantee
High volume can strengthen a breakout signal, but it does not guarantee that the breakout will succeed.
Test across different market conditions
Trend-following breakout systems typically perform differently during strong bull markets, corrections, sideways markets, and high-volatility periods. Evaluate results across multiple market regimes before relying on the strategy.
Pay attention to execution
The strategy uses stop-entry orders above recent highs. In live trading, gaps, slippage, spreads, and intrabar price movement can cause actual execution prices to differ from backtested results.
Important Note
This strategy is inspired by trend-template and volatility-contraction concepts, but it is not a complete implementation of a textbook VCP. It uses a simplified statistical contraction model rather than explicitly identifying multiple successive contractions, contraction depths, and their associated volume characteristics.
Backtest results are hypothetical and do not guarantee future performance. Always consider commissions, slippage, liquidity, position sizing, and market conditions when evaluating a strategy.
Recommended starting configuration: Daily timeframe, liquid stocks, default trend filter, volume confirmation enabled, and the default tiered risk-management settings.
Strategia

Trend Angle Momentum [MarkitTick]💡 This tool measures market structure not just as a sequence of highs and lows, but as a rate of directional change. It detects confirmed swing pivots and then calculates the geometric angle of the trendline connecting each pivot to the one before it, translating pure price action into a single, intuitive metric: degrees of trend steepness. Instead of asking traders to infer momentum from candle shape or oscillator divergence, it hands them a number — the actual angle of ascent or descent between structural turning points — along with an optional smoothed reading of how that angle is evolving over time.
✨ Originality and Utility
Most swing-detection tools stop at marking the high or low. This script goes a step further by quantifying the relationship between consecutive swings using trigonometry. Each swing-to-swing move is converted into a percentage price change, which is then run through an arctangent function to produce a true geometric angle in degrees, independent of the instrument's absolute price scale. A move on a $2 stock and a move on a $2,000 stock that share the same percentage steepness will report the same angle, making the readings comparable across symbols and timeframes in a way that raw price-based slope calculations cannot achieve.
The utility here is twofold. First, the angle itself acts as a quantified momentum proxy: a shallow angle after a strong prior swing signals decelerating momentum well before a lagging oscillator would confirm it, while a steepening angle on successive swings signals acceleration. Second, an optional Angle Momentum layer tracks a rolling average of the last several swing angles, smoothing out single-swing noise and revealing whether the broader structural rhythm of the market is strengthening or weakening. This combination — geometric normalization plus rolling angle smoothing — gives traders a structural momentum read that is not available from stock pivot tools or generic slope indicators alone.
🔬 Methodology and Concepts
• Confirmed Pivot Detection
The script identifies swing highs and swing lows using a symmetric fractal method: a bar is only confirmed as a pivot high if it is higher than a defined number of bars to its left and right, and likewise for a pivot low. The "Left Bars" and "Right Bars" inputs control how many bars on each side must confirm the extreme. Because the right-side bars must fully close before a pivot can be validated, every pivot marked on the chart is confirmed historical structure, not a live, moving estimate — the marker is deliberately plotted with a backward offset equal to the right-bar count so that its horizontal position matches where the actual swing extreme occurred, not where it was confirmed.
• Percent-to-Angle Conversion
Once two consecutive confirmed pivots of the same type (high-to-high or low-to-low) are available, the script calculates the percentage price change between them. This percentage is then optionally normalized by the number of bars separating the two pivots (via the "Normalize Angle by Bars" input), which converts the reading from "how much did price move" into "how much did price move per bar," a more useful measure of steepness when swings vary widely in duration. The resulting rate is passed through an arctangent function and converted from radians to degrees, producing a bounded, intuitive angle: values approaching plus or minus ninety degrees represent extremely steep percentage moves, while values near zero represent flat, sideways structure.
• Angle Momentum (Optional Smoothing Layer)
When enabled, the script maintains a running array of the most recent swing angles (separately for highs and lows) and reports their simple average over a user-defined lookback length. This produces a second-order reading: rather than looking at a single swing's angle in isolation, it shows whether the sequence of recent swing angles is, on average, steep or shallow, positive or negative — a way of gauging whether structural momentum is building or fading across several swings rather than just the most recent one.
• Live Dashboard
A compact on-chart table continuously summarizes the last confirmed high pivot price, the last confirmed low pivot price, the most recent high-swing angle, the most recent low-swing angle, and whether Angle Momentum smoothing is currently active, giving traders a persistent numerical snapshot without needing to hover over chart objects.
🎨 Visual Guide
Diagonal trend lines connecting consecutive swing highs (default red/green by angle sign) and consecutive swing lows are drawn directly between the two pivot points, visually representing the geometric slope being measured.
A small numeric label at the midpoint of each swing line displays the calculated angle in degrees, colored green for a positive (upward) angle and red for a negative (downward) angle by default.
When Angle Momentum is enabled, an additional label appears at the most recent pivot showing the smoothed "Mom" value in a distinct color (orange for highs, blue for lows by default), separated visually from the raw single-swing angle label.
Cross-style markers plot at each confirmed pivot high and pivot low directly on price, offset backward to align with the actual bar where the extreme occurred.
The dashboard table (position configurable) shows the symbol, timeframe, last high and low pivot prices, the latest angle readings for each, and the current on/off state of Angle Momentum.
📖 How to Use
Treat the angle label on each swing line as a normalized momentum reading for that specific leg of price action: steep angles indicate strong directional conviction, shallow angles indicate a weakening or consolidating move.
Compare the angle of the most recent swing to the angle of the swing before it. A sequence of progressively shallower high-to-high angles during an uptrend can indicate fading bullish momentum even while price is still making new highs, a structural early warning that pure price action alone may not show.
When Angle Momentum is enabled, use the smoothed "Mom" reading as a broader confirmation layer: a rising average angle across several swings supports the idea that momentum is genuinely building, rather than reacting to a single outlier swing.
Divergences between price structure and angle behavior — for example, higher swing highs paired with a declining angle momentum reading — can be used as a discretionary caution signal ahead of a potential trend deceleration.
The two alert conditions ("High Pivot Formed" and "Low Pivot Formed") can be used to build automated or semi-automated workflows that trigger only once a swing point is fully confirmed, rather than on every bar.
⚠️ Confirmation Lag Notice
All pivots and their associated angle calculations are confirmed structure. Because a pivot cannot be validated until the required number of bars on its right side have closed, every marker, line, and label is necessarily plotted a number of bars after the actual high or low occurred, equal to the "Right Bars" setting. The plotted markers are intentionally offset backward to align visually with the true location of the swing extreme — this does not mean the indicator is predicting or anticipating pivots in real time. Traders should treat swing confirmations as lagging structural events by design, not as leading signals.
⚙️ Inputs and Settings
Left Bars / Right Bars: Define the symmetric lookback and lookahead window used to validate a swing high or low. Larger values filter out minor fluctuations and confirm only more significant structural turning points, at the cost of a longer confirmation delay. Smaller values confirm pivots faster but are more sensitive to short-term noise.
Show High Swing Lines / Show Low Swing Lines: Independently toggle the diagonal trend lines connecting consecutive high or low pivots.
Show Swing Point Dots: Toggles the cross markers plotted directly at each confirmed pivot price.
Normalize Angle by Bars: When enabled, divides the percentage move between two pivots by the number of bars separating them before calculating the angle, producing a "steepness per bar" measure rather than a raw total-move angle. Useful for comparing swings of different durations on a more equal footing.
Use Angle Momentum: Enables the rolling average smoothing layer over the last several swing angles, plotted as an additional label at each new pivot.
Angle Momentum Length: Sets how many recent swing angles are averaged together for the smoothed momentum reading. Shorter lengths react faster to recent swings; longer lengths produce a smoother, slower-changing average.
Dashboard Position / Show Dashboard: Controls visibility and screen placement of the summary table.
High Pivot Action / Low Pivot Action: Custom text tags embedded into the JSON alert payload for each pivot type, useful for routing alerts to external automation systems that key off a specific action string.
Color inputs: Independently control the color of swing lines, angle text, pivot cross markers, momentum labels, and dashboard theming to match personal charting preferences.
🔍 Deconstruction of the Underlying Scientific and Academic Framework
The core of this indicator rests on classical trigonometric slope analysis rather than any single named technical analysis school. Converting a price move into an angle is mathematically equivalent to computing the arctangent of a rate of change, the same operation used broadly in engineering and physics to express a gradient as an angular measure rather than a raw ratio. Expressing the swing-to-swing move as a percentage change before applying the arctangent function normalizes the calculation across instruments of different absolute price levels, addressing a well-known limitation of naive "price-per-bar" slope measures, which are not comparable between a low-priced and high-priced instrument, or between two different timeframes without adjustment. The optional bar-normalization step draws on the same logic used in rate-of-change and momentum oscillators broadly, where a raw price delta is scaled by the time or bar interval over which it occurred to produce a comparable velocity-style reading rather than a simple magnitude.
The pivot detection mechanism itself is a fractal/symmetric extremum test, a widely used method in swing-structure analysis (related in spirit to Bill Williams' fractal indicator and to classical Dow Theory's emphasis on confirmed swing highs and lows as the building blocks of trend structure) that requires a candidate bar to dominate a defined number of bars on both sides before being accepted as a genuine local extremum. This symmetric confirmation requirement is a standard technique for filtering transient noise out of swing-point identification, at the deliberate cost of confirmation lag, a well-documented trade-off in any lookback-based extremum detection method. The Angle Momentum layer applies a simple moving average — one of the most foundational smoothing techniques in time-series analysis — to the sequence of discrete angle readings themselves rather than to price, effectively treating "swing angle" as its own derived data series and smoothing it the same way a moving average would smooth a price or oscillator series, in order to separate signal (the underlying trend in momentum) from noise (single-swing outliers).
⚠️ Disclaimer
All provided scripts and indicators are strictly for educational exploration and must not be interpreted as financial advice or a recommendation to execute trades. We expressly disclaim all liability for any financial losses or damages that may result, directly or indirectly, from the reliance on or application of these tools. Market participation carries inherent risk where past performance never guarantees future returns, leaving all investment decisions and due diligence solely at your own discretion. Indicatore

TRADLEWARE-Ichimoku TK-Cross + MFI SOL
Ichimoku TK-Cross + Money Flow Index
This strategy uses the classic Ichimoku Cloud system to catch confirmed trend entries on a high-volatility altcoin, with a volume-based filter added to screen out low-conviction fakeouts.
How it works
Ichimoku Kinko Hyo ("one-glance equilibrium chart") is a trend system built from a few moving-midpoint lines. The Tenkan (short-term, plotted in blue) and Kijun (medium-term, plotted in orange) lines are each the midpoint of the highest high and lowest low over their own lookback window — similar in spirit to a moving average, but based on the range rather than the close. Two further lines, Senkou A and B, are projected forward to form the "cloud" (Kumo): a band that acts as dynamic support and resistance, shaded teal when it's bullish (Senkou A above Senkou B) and red when bearish.
On top of this, the Money Flow Index (MFI) — a volume-weighted version of RSI — checks that money is actually flowing into the asset, not just that price has moved.
Entry
A long position is opened when all three conditions are true simultaneously:
The blue Tenkan line crosses above the orange Kijun line (a bullish momentum shift)
Price is above the cloud, which should be shaded teal at this point (the broader trend is confirmed bullish)
The Money Flow Index is above 50 (volume-weighted money flow is positive, not just price drifting up on thin conviction)
The MFI filter exists specifically because this asset is prone to fakeout breakouts — moves that clear the cloud on price alone but aren't backed by real buying volume.
Exit
The position is closed when price closes back below the orange Kijun line — the "equilibrium" level the whole system is built around. An optional stop-loss (on by default) sits at the bottom of the cloud: if price loses the entire cloud — meaning it closes below whichever of the teal/red Senkou lines is lower — the broader trend structure itself has broken, not just short-term momentum.
Parameters
Tenkan length: 20
Kijun length: 60
Senkou B length: 120 (the cloud is projected forward by the Kijun length, the classic convention)
MFI length: 14
MFI minimum: 50 (stable across a 50-60 range in testing, not a fragile single value)
Stop-loss at cloud bottom: on by default, can be disabled
Label offset (ATR multiples): purely cosmetic — controls how far the BUY/SELL text labels sit from the candles so they don't overlap TradingView's own trade markers
Start/End date range inputs let you restrict the backtest window without editing code
Position sizing is set to 99.95% of equity per trade rather than a full 100%. That small gap is deliberate: on this timeframe, sizing at exactly 100% causes TradingView to occasionally generate tiny extra "Margin call" rows in the trade list from floating-point rounding after commission — enough of them, on this script, to noticeably distort the displayed win rate. The 0.05% gap removes those artifacts; the effect on actual results is negligible.
Costs modelled
0.1% commission per side, 3 ticks slippage, fills at next bar's open.
Intended assets and timeframe
4-hour bars. Designed and tested in Python on SOL/USDT, then validated against a live TradingView backtest on BINANCE:SOLUSDT — entry and exit prices matched to the cent on the large majority of trades. Parameters were tuned specifically for SOL's volatility profile and are not expected to carry over unchanged to other assets.
Strategia

TRADLEWARE-Gaussian Channel + StochRSI ETH
Gaussian Channel + Stochastic RSI ETH
This strategy combines a fast Gaussian Channel with a Stochastic RSI filter and a 200-day SMA bull-market gate, aimed at catching trend continuation while sitting out confirmed downtrends.
How it works
The Gaussian Channel is a smoothed price envelope built with an IIR (infinite impulse response) filter — a mathematically elegant alternative to a simple moving average. It applies a bell-curve weighting across recent bars, producing smooth, low-lag output. The channel is formed by adding and subtracting a filtered measure of true range (volatility) around the central filter line.
The channel turns green when the filter is rising (uptrend) and red when it is falling (downtrend). A separate 200-day simple moving average acts as a bull/bear regime switch: the strategy only trades when price is above it.
Entry
A long position is opened when all five conditions are true simultaneously:
The channel is green (filter rising — uptrend confirmed)
Price closes above the upper band (breakout above the channel; an optional buffer above the band can require more room, but testing found this counterproductive — see Parameters)
Stochastic RSI %K is either above 80 (strong momentum confirming the breakout) or below 25 (oversold dip within the uptrend)
Price is above the 200-day SMA (bull regime — can be disabled)
The signal bar itself closes above its own open — a bullish candle (can be disabled)
The bullish-candle check filters out breakout bars that clear the upper band intrabar but still close weak — a common precursor to an immediate whipsaw exit on the next bar.
The 200-day SMA gate exists specifically to block breakout entries that fire during bear-market bounces — dead-cat rallies that look like trend resumption on the channel and oscillator alone but occur underneath a still-falling long-term average.
Exit
The position is closed when either:
Price closes back below the upper band (breakout has failed or the trend is cooling), or
The channel reverses from green to red (trend direction has flipped)
An optional stop-loss (on by default) is placed at the lower band and trails as the channel moves, providing a floor on losses if price drops sharply through both the upper and lower bands in the same move. The regime gate only blocks new entries — it does not force an exit on its own if price falls back below the 200-SMA mid-trade.
Parameters
Poles: 4 (filter smoothness — higher = smoother but more lag)
Sampling Period: 89 (faster channel than the baseline version, reacts sooner to trend changes)
True Range Multiplier: 1.5 (controls channel width)
Stochastic RSI overbought threshold: 80
Stochastic RSI oversold threshold: 25 (a parameter sweep found a stable plateau from 22-28; 25 sits at its center rather than its single best value)
200-SMA regime gate: on by default, can be disabled; length is adjustable
Bullish entry candle requirement: on by default, can be disabled
Entry breakout buffer: 0% (off) by default; tested at multiple levels above 0% and found to reduce returns at every level, so left disabled
Stop-loss at lower band: on by default, can be disabled
Start/End date range inputs let you restrict the backtest window without editing code
Costs modelled
0.1% commission per side, 3 ticks slippage, fills at next bar's open.
Intended assets and timeframe
Daily bars. Designed and validated on ETH/USDT. Likely applicable to other trending crypto assets; not validated on equities .
Known limitations
Underperforms in choppy or ranging markets — the upper band breakout condition generates whipsaws when price oscillates without directional conviction. The regime gate is a trade-off: it blocks bear-bounce false starts, but it also means the strategy can miss the first leg of a genuine new uptrend until price reclaims the 200-day SMA. The filter requires several hundred bars of history to fully converge; results on very short histories may differ from the validated backtest. The strategy trades infrequently (around 28 trades on the validated window), so treat any single backtest run as a small sample rather than a statistically strong result.
Credit
The Gaussian Channel filter is from the open-source "Gaussian Channel (DW)" indicator by DonovanWall. This script reuses that filter and adds the Stochastic RSI entry filter, the 200-day SMA regime gate, exit rules, stop-loss, and full strategy order management on top of it.
Strategia

Bollinger-Fibonacci Trend Extension [MarkitTick]💡 This tool automates the identification of three-point corrective price structures (A-B-C swings) and projects a suite of Fibonacci-based extension targets from them, filtered through a Bollinger Band mean-reversion confirmation layer and an optional trend-strength gate. Rather than requiring a trader to manually draw retracement/extension tools every time price forms a pullback, the script continuously scans pivot structure in real time, validates the geometry of each swing against strict corrective-wave rules, and projects a set of forward-looking price zones — including a shaded "Golden Zone" between the 1.5 and 1.618 extensions — the moment a qualifying structure is confirmed.
✨ Originality and Utility
Fibonacci extension tools are common on TradingView, but most require manual anchor placement on every swing and provide no objective criteria for which swings are valid setups. This script closes that gap by fully automating structure detection: it runs a custom zigzag engine with a significance threshold (ATR-based or percentage-based) to filter noise, then validates any three consecutive pivots against explicit corrective-structure rules (alternating high/low sequence, with the C-point required to retrace between the A and B extremes) before it will draw anything.
Two independent confirmation layers are stacked on top of raw structure detection: a Bollinger Band basis-cross filter that requires price to be trading on the correct side of its short-term mean before a new structure is accepted, and an optional ADX/DMI filter that suppresses structures formed during low directional-strength conditions. A configurable "adaptive filter" further lets traders pre-smooth the high/low series feeding the pivot engine using one of eight smoothing methods — including a Kalman filter and an LLAMA (linear-regression-slope-adjusted moving average) implementation — before pivots are ever detected, changing the sensitivity and lag characteristics of what counts as a swing point. The combination of automated, rule-based structure validation, dual confirmation filters, and selectable pre-smoothing is what differentiates this from a static or manually-drawn extension tool.
🔬 Methodology and Concepts
• Adaptive Pivot Detection
The script identifies swing highs and lows using a symmetric lookback/lookforward window (the "Pivot Lookback Depth" input): a bar qualifies as a pivot high only if no other bar within that window on either side has a higher value, and analogously for pivot lows. Traders can choose to feed this detection engine either raw high/low price or a smoothed version of it via the Adaptive Filter setting. Available smoothing methods include standard SMA, EMA, and RMA; a Double WMA (a WMA applied twice in succession, sharpening lag reduction); a Triple VWMA (volume-weighted MA applied three times); HMA (Hull Moving Average); LLAMA, a custom method that adds a linear slope projection (calculated from the change in price over the lookback window) on top of a simple average; and a lightweight Kalman filter that recursively updates a state estimate based on a fixed process/measurement noise ratio. Smoothing the pivot source changes which swings register as significant, effectively tuning the sensitivity of the whole structure-detection pipeline.
• Significance Threshold
Not every alternating high/low pair is kept — a new pivot only replaces the prior point of the same type, or is added as a new leg, if it clears a minimum distance threshold from the last opposite-type point. This threshold can be set as a multiple of ATR (Average True Range, over a configurable period) or as a fixed percentage of the current close, letting the sensitivity of the zigzag scale with volatility or stay fixed in percentage terms.
• A-B-C Structure Validation
Once at least three qualifying zigzag points exist, the script inspects the most recent three (A, B, C) to determine whether they form a valid corrective structure. A bullish setup requires the sequence low → high → low (A is a low, B a high, C a low), with the additional geometric constraint that point C must close above point A but below point B — meaning the pullback from B did not fully retrace into new lows and did not exceed the origin of the move. The bearish case is the mirror image (high → low → high, with C bounded between A and B). Structures that don't satisfy these geometric constraints are rejected outright; the script will not draw a structure from just any three consecutive swings.
• Bollinger Band Confirmation Filter
When enabled, a newly detected A-B-C structure is only accepted if the prior confirmed close is positioned correctly relative to the Bollinger Band basis (an SMA of price, with upper/lower bands built from standard deviation multiples): bullish structures require the close to be above the basis, bearish structures require it to be below. This filters out structures forming against the prevailing short-term mean, reducing the incidence of countertrend triggers.
• ADX/DMI Trend-Strength Filter (optional)
When the ADX filter is enabled, new structures are only confirmed if the ADX value (calculated from the Directional Movement Index over a configurable length) meets or exceeds a user-defined threshold. This is intended to suppress structure formation during ranging, low-momentum conditions where corrective patterns are statistically less reliable.
• Fibonacci Extension Projection
Once a structure is confirmed, the script projects forward price targets from the A-B-C swing using the standard extension formula: target = C + ((B − A) × ratio). An optional logarithmic-scale calculation is available, which performs the equivalent projection in log-price space before converting back — useful on instruments or timeframes where percentage moves are more meaningful than absolute point moves. Selectable extension ratios include 0.618, 1.000, 1.272, and 1.618, each independently toggleable, plus a fixed internal 1.5 ratio used only to bound the shaded "Golden Zone." Each level is optionally annotated with a loose Elliott Wave association label (e.g., the 1.618 level is labeled "Wave 3") purely as a descriptive reference point for traders familiar with that framework — the script does not perform full Elliott Wave counting or degree analysis.
• Structure Invalidation
Active structures are continuously monitored: a bullish structure is invalidated if the close trades back below point A, and a bearish structure is invalidated if the close trades back above point A. This uses the point-A extreme as a structural stop level, consistent with the idea that a valid corrective pattern should not be revisited past its origin. On invalidation, the trader can choose to have the structure's drawings grayed out in place (to preserve chart history) or fully deleted.
🎨 Visual Guide
Gold and blue lines plotted directly on price represent the Bollinger Bands: the basis (gold, an SMA of price) and the upper/lower bands (blue, basis ± a standard-deviation multiple). These can be hidden independently of the confirmation filter itself.
Solid colored lines connect point A to point B, and dashed colored lines connect point B to point C, forming the visual "A-B-C" skeleton of each detected structure. Color reflects direction: the Bullish Structure Color for up-setups and the Bearish Structure Color for down-setups (both user-configurable, default green/red).
Small labeled tags marked "A," "B," and "C" are placed at each swing point, color-matched to the structure's direction, with their vertical orientation (label above or below price) automatically flipped depending on whether the point is a high or a low.
Dotted horizontal lines extending from point C represent each active Fibonacci extension level (0.618, 1.000, 1.272, 1.618, as enabled). The 1.618 level is rendered as a solid line rather than dotted, distinguishing it as the primary extension target. Each line carries a right-aligned label showing the ratio, its optional Elliott Wave tag, and the exact price level.
A shaded rectangular zone between the 1.5 and 1.618 extension levels — tinted in the structure's directional color — marks the "Golden Zone," a commonly-referenced confluence area for potential reversals or profit-taking, with a "Golden Zone" text label at its midpoint.
When a structure is invalidated and the "Gray Out" invalidation action is selected, all of the above elements (lines, labels, the zone fill) desaturate to the Invalidated Structure Color, visually distinguishing historical, no-longer-valid structures from the currently active one without removing them from the chart.
An on-chart dashboard (top-right by default, repositionable) displays: the current symbol and timeframe, an overall directional Bias read from the most recent structure, the current ATR value, the active significance threshold in price terms, a visual bar-gauge showing how many structures are currently tracked relative to the configured maximum, the pass/block state of the Bollinger Band filter, the live ADX reading and pass/fail state, the selected Adaptive Filter method, and a log of the last structural event (new bullish/bearish structure, or bullish/bearish invalidation).
📖 How to Use
Wait for a complete A-B-C structure to be drawn and confirmed — the script only finalizes structures on confirmed bar closes, so no signal will repaint intrabar.
A newly confirmed bullish structure (green by default) suggests the recent pullback (B to C) may extend toward the plotted Fibonacci levels; the 1.618 extension and the shaded Golden Zone are commonly treated as primary target/reaction areas.
A newly confirmed bearish structure works symmetrically to the downside.
Point A acts as the structural invalidation level: if price closes back through point A against the direction of the setup, treat the structure as void — the script will automatically flag this via graying-out or deletion, along with a dashboard "Last Event" update and an optional alert.
Use the Bollinger Band filter to avoid structures forming against the short-term mean, and the ADX filter to avoid trading corrective setups during flat, low-momentum conditions.
The dashboard's Bias, Threshold, and filter-status rows are designed to be checked at a glance before acting on any newly drawn structure.
Built-in alerts are available for new bullish/bearish structures and for bullish/bearish invalidations, each firing a JSON-formatted payload (ticker, timeframe, direction, entry, TP, SL) suitable for direct use with webhook-based automation, with the action keywords for each alert type fully customizable in the Alerts group.
⚙️ Inputs and Settings
Pivot Lookback Depth — the number of bars checked on each side of a candidate bar when detecting swing highs/lows. Larger values produce fewer, more significant pivots and slower reaction time; smaller values increase sensitivity and structure frequency.
Use ATR-Based Threshold / ATR Period / ATR Multiplier — when enabled, the minimum move required to register a new zigzag leg scales with recent volatility (ATR × multiplier) rather than a fixed percentage.
Fixed Deviation % — used instead of the ATR threshold when ATR-based thresholding is disabled; sets the minimum percentage move required between opposite-type pivots.
Enable Structure Invalidation — toggles whether structures are automatically invalidated when price closes back through point A.
Keep Last N Structures — caps how many structures remain tracked/drawn simultaneously; older structures are cleaned up once the cap is exceeded.
Enable BB Confirmation Filter / BB Length / BB StdDev Mult — controls the Bollinger Band basis-cross requirement for new structures, and the parameters of the underlying Bollinger Band calculation.
Use ADX Filter / ADX Threshold / ADX Length — controls the optional trend-strength gate and its calculation parameters.
Adaptive Filter / Adaptive Filter Length — selects the smoothing method (if any) applied to the high/low series before pivot detection, and its lookback length.
Invalidation Action — choose whether invalidated structures are grayed out in place or deleted from the chart.
Show Bollinger Bands / Use Logarithmic Scale — visual toggle for the BB plots, and whether extension targets are computed in log-price space.
Show 0.618 / 1.000 / 1.272 / 1.618 Level — independently toggle each Fibonacci extension line.
Extend Lines Right — extends extension lines indefinitely to the right instead of stopping at the current bar.
Show A-B-C Labels / Show Structure Lines / Show Elliott Wave Labels — independent visibility toggles for each drawing category.
Show Dashboard / Position — toggles the on-chart dashboard table and sets its screen corner.
Alert action fields (Open Long/Short, Close Long/Short) — customizable text keywords embedded in the JSON alert payloads, matching the syntax expected by the trader's automation/webhook setup.
Enable Test Alert — fires a payload on every confirmed bar close, intended only for verifying webhook routing before disabling it.
Color inputs — full control over structure colors, label backgrounds, invalidated-structure color, Bollinger Band plot colors, and dashboard styling.
🔍 Deconstruction of the Underlying Scientific and Academic Framework
The script's structural core rests on the concept of a zigzag transformation, a standard technique in technical analysis for reducing noisy price series into a simplified sequence of significant turning points, filtered here by a volatility-normalized (ATR-scaled) or percentage-based significance threshold rather than a fixed tick count — a design choice that keeps the sensitivity of the transformation consistent across instruments and volatility regimes.
The A-B-C labeling convention and the specific extension ratios offered (0.618, 1.000, 1.272, 1.618) draw on the Fibonacci sequence and its derived ratios, which have a long history of application in corrective-wave analysis, most notably within Elliott Wave Theory and W.D. Gann's work on proportional price projections. The mathematical basis is the golden ratio (φ ≈ 1.618) and its reciprocal/power relationships, which recur in the ratios above; their use in this script is descriptive and pattern-based rather than derived from any claim of causal market structure — the script projects targets from these ratios but does not assert that price is mechanically obligated to reach them.
The optional Bollinger Band filter is grounded in the standard statistical definition of a Bollinger Band: a moving-average basis with bands set at a multiple of the rolling standard deviation, functioning here as a simple mean-reversion/trend-context gate rather than a full volatility-breakout system.
The ADX/DMI filter derives from Welles Wilder's Directional Movement System, which measures trend strength independently of trend direction by comparing the magnitude of directional price movement to overall volatility (true range) over a smoothing period; using it as a pre-condition for structure confirmation is consistent with its original design purpose of distinguishing trending from non-trending regimes.
The adaptive smoothing options span several distinct estimation philosophies: SMA/EMA/RMA represent classical fixed- and exponentially-weighted moving averages; the Double WMA and Triple VWMA apply cascaded weighted/volume-weighted averaging to reduce lag at the cost of some smoothness; HMA (Hull Moving Average) is a weighted-average construction specifically designed to reduce lag while preserving smoothness; the Kalman filter implementation applies a simplified recursive Bayesian estimation approach (balancing a process-noise and measurement-noise ratio to continuously re-weight new observations against the prior estimate), a technique originally developed for state estimation in control systems and adapted here for price smoothing; and the LLAMA method combines a simple average with a linear slope term derived from the net change in price over the lookback window, a basic linear-regression-style adjustment for trend drift.
⚠️ Disclaimer
All provided scripts and indicators are strictly for educational exploration and must not be interpreted as financial advice or a recommendation to execute trades. We expressly disclaim all liability for any financial losses or damages that may result, directly or indirectly, from the reliance on or application of these tools. Market participation carries inherent risk where past performance never guarantees future returns, leaving all investment decisions and due diligence solely at your own discretion. Indicatore

TRADLEWARE-Gaussian Channel + StochRSI BTC
TRADLEWARE - Gaussian Channel + Stochastic RSI
This strategy combines a Gaussian Channel with a Stochastic RSI filter to capture momentum continuation in trending markets on the daily timeframe.
How it works
The Gaussian Channel is a smoothed price envelope built with an IIR (infinite impulse response) filter — a mathematically elegant alternative to a simple moving average. Instead of weighting recent bars linearly, the Gaussian filter applies a bell-curve weighting that produces very smooth, low-lag output. The channel is formed by adding and subtracting a filtered measure of true range (volatility) around the central filter line.
The channel turns green when the filter is rising (uptrend) and red when it is falling (downtrend).
Entry
A long position is opened when all three conditions are true simultaneously:
The channel is green (filter rising — uptrend confirmed)
Price closes above the upper band (breakout above the channel)
Stochastic RSI %K is either above 80 (strong momentum confirming the breakout) or below 15 (oversold dip within the uptrend)
The dual Stochastic RSI threshold captures two different entry scenarios: a momentum breakout and a pullback-and-recover within an ongoing trend.
Exit
The position is closed when either:
Price closes back below the upper band (breakout has failed or the trend is cooling), or
The channel reverses from green to red (trend direction has flipped)
An optional stop-loss (on by default) is placed at the lower band and trails as the channel moves, providing a floor on losses if price drops sharply through both the upper and lower bands in the same move.
Parameters
Poles: 4 (filter smoothness — higher = smoother but more lag)
Sampling Period: 144 (slow channel, suited to daily trends)
True Range Multiplier: 1.414 (controls channel width)
Stochastic RSI overbought threshold: 80
Stochastic RSI oversold threshold: 15
Stop-loss at lower band: on by default, can be disabled
Start/End date range inputs let you restrict the backtest window without editing code
Costs modelled
0.1% commission per side, 3 ticks slippage, fills at next bar's open.
Intended assets and timeframe
Daily bars. Designed and validated on BTC/USDT. Likely applicable to other trending crypto assets; not validated on equities .
Known limitations
Underperforms in choppy or ranging markets — the upper band breakout condition generates whipsaws when price oscillates without directional conviction. The filter requires several hundred bars of history to fully converge; results on very short histories may differ from the validated backtest. The strategy trades infrequently (around 30 trades from 2018 to present on BTC/USDT), so treat any single backtest run as a small sample rather than a statistically strong result.
Credit
The Gaussian Channel filter is from the open-source "Gaussian Channel (DW)" indicator by DonovanWall. This script reuses that filter and adds the Stochastic RSI entry filter, exit rules, stop-loss, and full strategy order management on top of it.
Strategia

Indicatore

Smart Trend Filter Confirmation [MarkitTick]💡 A confirmed-bar trend-following system that fuses a volatility-adaptive trailing band with a six-condition consensus filter, designed to suppress the false flips that plague standard trend-following tools when markets stall, chop, or thin out. Rather than reacting to every band cross, the script cross-examines each potential signal against stall detection, slope strength, volume participation, range compression, basis-point movement, and trend strength (ADX) before allowing a flip to display — while retaining a breakout override so genuinely explosive moves are never suppressed by the very filters designed to catch noise.
✨ Originality and Utility
Trailing-band trend systems (Chandelier-style or SuperTrend-style constructs) are common on TradingView, but nearly all of them share the same weakness: the trailing line flips direction on every price crossover, regardless of whether that crossover reflects a genuine change in market character or simply noise generated during a stalled, illiquid, or compressing market. This script's originality lies in the "Regime Consensus" layer built on top of the adaptive trailing band. Six independent, mathematically distinct filters — measuring band stall, linear-regression slope, relative volume, historical range percentile, basis-point velocity, and ADX-based trend strength — are computed every bar. If any single filter flags a "flat" regime, the display direction is held at its last confirmed state instead of flipping, which materially reduces whipsaw signals in ranging conditions. A dedicated breakout override simultaneously monitors for abnormally large single-bar moves (measured in ATR multiples) and forces the flip through regardless of filter status, ensuring the system does not become sluggish during genuine volatility expansion. This combination — adaptive smoothing of the source price, a volatility- and momentum-weighted dynamic band, a multi-factor flat-market veto, and a breakout bypass — is not a simple mashup of stock indicators but an integrated decision layer where each component directly informs whether the others are permitted to act. The trend line, filters, override, and dashboard are not separable add-ons; they operate as a single signal-gating pipeline.
🔬 Methodology and Concepts
● Adaptive Source Smoothing
Before any band math is applied, the script conditions the underlying HL2-style source price using one of two selectable adaptive filters:
Kalman Filter — a recursive estimator that maintains an internal "belief" about the true price and a corresponding uncertainty (error covariance). Each new bar, the filter computes a gain factor from the ratio of predicted uncertainty to total uncertainty (predicted plus measurement noise, set by the Kalman R input) and blends the new price observation into its estimate proportionally. A higher Kalman Q input allows the estimate to adapt faster to new prices; a higher Kalman R input makes the filter trust new observations less, producing a smoother but slower-reacting line.
LLAMA (an adaptive-length moving average inspired by Kaufman's Efficiency Ratio concept) — measures how efficiently price has moved over the lookback window by comparing net directional change to the sum of all bar-to-bar movement (an efficiency ratio between 0 and 1). This ratio is squared into a smoothing constant that continuously shifts the moving average's responsiveness between a fast EMA-like constant and a slow EMA-like constant, so the average tightens to price during clean directional runs and widens during choppy conditions.
• Dynamic Volatility Band
The core trailing band's half-width is not a fixed ATR multiple. It is calculated from three weighted components: a base multiplier, an ATR-based term scaled by the ATR Weight input, and a normalized recent-price-movement term (capped at its own 95th percentile to prevent single outlier bars from distorting the band) scaled by the Move Weight input. This composite value is then multiplied by the current ATR and smoothed with an exponential moving average (controlled by the Smooth Len input) to prevent the band width itself from jumping erratically bar to bar.
• Trailing Trend Line Construction
The trend line follows classic chandelier-style trailing logic: while price remains above the trend line, the line can only ratchet upward (never retreating below its prior value even if the lower band momentarily dips beneath it); while price remains below the trend line, the line can only ratchet downward. A flip only occurs when confirmed prior-bar closing price crosses to the opposite side of the line.
• Six-Factor Regime Consensus Filter
Before a directional flip is permitted to display, up to six independent conditions are checked. If any active filter flags the market as "flat," the displayed direction holds at its previous confirmed state rather than flipping:
Stall Filter — flags when the trend line's bar-to-bar movement is smaller than a fraction (Flatness input) of current ATR, indicating the line itself has gone quiet.
Slope Filter — runs a short linear regression across recent trend-line values, measures the resulting slope, normalizes it against ATR, and flags when that normalized slope falls below the Slope Thr input.
Volume Filter — flags when confirmed volume falls at or below its own moving average, treating below-average participation as unreliable for a fresh directional call.
Range Filter — flags when the current bar's high-low range falls within the lower percentile band (Range Pct input) of its historical distribution over the Pctile Len lookback, identifying range compression.
BPS Filter — converts the trend line's bar-to-bar movement into basis points relative to price and flags when that figure falls under the Min BPS input, catching moves too small to be economically meaningful.
ADX Filter — computes a standard Directional Movement Index reading and flags when it sits below the ADX Thr input, indicating weak underlying trend strength.
• Breakout Override
Running in parallel to the consensus filters, this component measures the absolute prior-bar price change against a multiple of ATR (Ovr ATR Mult input). If that threshold is exceeded, the override forces the flip through immediately, bypassing every flat-market filter above. This prevents the filter layer from muting the system's response to genuine volatility expansion or breakout conditions.
🎨 Visual Guide
Trend Line — a stepped line plotted along the confirmed trailing band value. It renders in the Bull color when the confirmed direction is up and the Bear color when down; both colors are fully customizable in the Colors group.
Gradient Candles / Bar Coloring — when enabled, chart candles and bars are recolored on a gradient between the Neutral color and the active directional color, with gradient intensity scaled by how far confirmed price has extended from the trend line relative to ATR (capped at 3x ATR for full saturation). A muted candle indicates price sitting close to the trend line; a fully saturated candle indicates an extended move.
Cloud Fill — a semi-transparent fill (opacity set by Cloud Transp) rendered between the trend line and a short moving average of HLC3 (length set by Cloud MA Len), tinted in the active directional color to visually reinforce which side of the trend the market currently occupies.
Bull / Bear Signal Labels — a "Bull" label appears below price the bar a confirmed flip to the up-regime occurs, and a "Bear" label above price on a confirmed flip to the down-regime, provided the Regime Consensus Filter did not veto the flip and Lock Signal is not engaged.
Trade Level Lines and Labels (optional, enabled via Show Trade Levels) — on each new confirmed signal, five lines are drawn forward from the signal bar: an Entry line (at prior confirmed close), a Stop Loss line, and three Take Profit lines (TP1, TP2, TP3), each offset from entry by ATR multiples set in the Trade Tools group. A shaded risk zone connects Entry to Stop Loss, and a shaded reward zone connects Entry to the furthest take-profit line. Each line carries a right-aligned label showing its exact price.
Live Dashboard (optional, position configurable via Dash X / Dash Y) — a compact table summarizing current symbol/timeframe, signal lock state, active direction, current signal status, regime classification (Flat/Trending), breakout override status, active adaptive filter type, current trend-line and ATR values, a visual progress bar for trend strength, and individual on/off/flat status readouts for each of the six regime filters.
Non-Standard Chart Warning — a red-bordered table automatically appears in the top-left corner if the script detects it is being run on a Heikin Ashi, Renko, Line Break, Kagi, or Point & Figure chart, warning that signal reliability is compromised on synthetic chart types.
📖 How to Use
A "Bull" label with the trend line switching to the Bull color signals a confirmed transition to an up-regime that has passed all active consensus filters (or was pushed through by the breakout override).
A "Bear" label with the trend line switching to the Bear color signals the equivalent confirmed down-regime transition.
Because flips are gated by the consensus filter, the absence of a new signal during a period of price consolidation is intentional — the script is treating the move as noise rather than a lack of function. Check the dashboard's individual filter rows to see exactly which condition(s) are currently classifying the market as flat.
The dashboard's "Override" row shows "Engaged" when the Breakout Override has just bypassed the filters — useful for distinguishing a filter-confirmed signal from a volatility-forced one.
When Show Trade Levels is active, treat the Entry/SL/TP lines as a reference risk framework tied to current ATR, not a guaranteed execution plan; always verify levels make sense for the instrument and timeframe before acting on them.
Enable Lock Signal to freeze the current signal state on the most recent bar, useful when reviewing historical signal behavior without new signals interrupting the current view.
If the Non-Standard Chart warning appears, switch to a standard candlestick chart type before relying on any signal from this script.
⚙️ Inputs and Settings
ATR Len — lookback period for the underlying ATR calculation that drives band width and multiple filter thresholds. Shorter values make the band more reactive to recent volatility; longer values smooth it out.
Band Mult, ATR Weight, Move Weight — the three components that combine into the dynamic band multiplier. Band Mult sets a base width, ATR Weight scales the contribution of current ATR relative to price, and Move Weight scales the contribution of recent capped price movement.
Smooth Len — the EMA length applied to the calculated band half-width, controlling how quickly the band itself can widen or narrow.
Adaptive Filter / Filter Type — toggles and selects between Kalman and LLAMA smoothing of the source price feeding the trend line.
Kalman Q / Kalman R — process noise and measurement noise inputs for the Kalman filter; higher Q increases responsiveness, higher R increases smoothing.
LLAMA Len — lookback window for the efficiency-ratio calculation driving the LLAMA adaptive average.
Stall Filter / Flatness — enables the stall check and sets the ATR-relative threshold below which trend-line movement is considered stalled.
Slope Filter / Reg Len / Slope Thr — enables the regression-slope check, sets its lookback window, and sets the normalized slope threshold below which the market is considered flat.
Volume Filter / Vol MA Len — enables the volume check and sets the moving-average length volume is compared against.
Range Filter / Pctile Len / Range Pct — enables the range-compression check and sets the historical lookback and percentile threshold used to classify current range as compressed.
BPS Filter / Min BPS — enables the basis-point movement check and sets the minimum basis-point threshold for a trend-line move to be considered meaningful.
ADX Filter / ADX Len / ADX Thr — enables the ADX-based trend-strength check and sets its calculation length and minimum threshold.
Breakout Ovr / Ovr ATR Mult — enables the override and sets the ATR multiple of single-bar price change required to force a flip through the filters.
Show Trade Levels / SL, TP1, TP2, TP3 ATR Mult — enables the trade-level drawing tool and sets each level's distance from entry as a multiple of ATR.
Bar Coloring, Bull/Bear Marks, Cloud Fill, Cloud MA Len, Cloud Transp — visual toggles and parameters controlling gradient candles, signal labels, and the cloud fill between trend line and reference average.
Show Dash, Dash X, Dash Y — toggles the dashboard and sets its screen position.
Long/Short/Close Action inputs — customizable text strings inserted into the "action" field of each alert's JSON payload, for direct use with automated webhook execution systems.
Colors group — full color customization for bull/bear/neutral states, label text, warning banner, dashboard theme, gradient candle tiers, and trade-level line colors.
🔍 Deconstruction of the Underlying Scientific and Academic Framework
The trailing-band mechanism draws on the same volatility-normalized stop methodology popularized by Chandelier Exit-style systems, which themselves extend J. Welles Wilder's Average True Range concept into an adaptive trailing stop: rather than a fixed price distance, the stop distance breathes with recently realized volatility, tightening in calm markets and widening in turbulent ones.
The Kalman filter option applies a classical state-space estimation technique originally developed for aerospace tracking problems (Rudolf Kálmán, 1960). It treats the "true" price trend as an unobserved state to be estimated from noisy observations, recursively updating a prediction and its uncertainty at each time step and weighting new information by a gain term derived from the relative magnitude of prediction versus measurement uncertainty. Applied to price series, it produces a smoothed estimate that adapts its own responsiveness based on the ongoing balance of signal versus noise.
The LLAMA adaptive average is built on an efficiency-ratio concept in the lineage of Perry Kaufman's Adaptive Moving Average research: the ratio of net directional displacement to total path length over a window quantifies how "efficiently" price has trended, and this ratio is used to interpolate the smoothing constant between fast and slow exponential-average bounds. Markets that trend efficiently receive a fast, responsive average; markets that chop inefficiently receive a slow, heavily smoothed one.
The Slope Filter applies ordinary least squares (OLS) linear regression across a short trend-line window to extract a first-derivative estimate (slope) of the trend line's trajectory, normalizing it by ATR so the threshold behaves consistently across instruments and volatility regimes of different scale.
The ADX Filter is grounded in Wilder's Directional Movement System, which decomposes price movement into positive and negative directional components and derives a smoothed trend-strength oscillator independent of direction — a standard framework for distinguishing trending from ranging conditions.
The Range Filter's use of percentile-rank classification reflects a basic non-parametric statistical approach: rather than assuming a normal distribution of high-low ranges, it empirically ranks the current range against its own recent historical distribution, which is more robust to the fat-tailed, non-normal behavior typically observed in financial return and range series.
Collectively, the six-factor consensus mechanism reflects a general principle from ensemble/multi-condition filtering: requiring independent, structurally uncorrelated confirmations to agree (or, here, requiring none to actively veto) before acting on a signal tends to reduce the false-positive rate relative to any single condition acting alone, at the cost of some responsiveness — a classic precision/recall tradeoff which the Breakout Override is specifically designed to mitigate during high-volatility regimes.
⚠️ Disclaimer
All provided scripts and indicators are strictly for educational exploration and must not be interpreted as financial advice or a recommendation to execute trades. We expressly disclaim all liability for any financial losses or damages that may result, directly or indirectly, from the reliance on or application of these tools. Market participation carries inherent risk where past performance never guarantees future returns, leaving all investment decisions and due diligence solely at your own discretion. Indicatore

VWAP Reversal Probability Signals🟠 OVERVIEW
VWAP Reversal Probability Signals tracks price movements around an anchored VWAP and two volume-weighted standard deviation bands. It looks for price excursions outside these bands and waits for price to move back through the same band before marking a potential reversal.
Each reversal signal is paired with a fixed VWAP target. The script records whether price reaches that target within a user-defined number of bars and displays the historical success rate for each band independently. This allows traders to compare how different reversal distances have performed over time instead of treating every signal the same.
🟠 CONCEPTS
Anchored VWAP — A volume-weighted average price that resets at the selected session, week, month, quarter, or year and acts as the central reference level.
VWAP Deviation Bands — Upper and lower bands created from volume-weighted standard deviation multiples around the anchored VWAP to define progressively larger price extensions.
Reversal Signal — Generated when price first extends beyond a deviation band and then closes back through that same band, indicating that the extreme move has started to reverse.
VWAP Target — Every signal uses the current anchored VWAP as its fixed target, allowing completed signals to be measured using the same destination.
Reversal Probability — The historical percentage of completed signals from each individual band that reached the VWAP target before the expiry period.
🟠 FEATURES
Anchored VWAP and Reversal Bands — Displays the anchored VWAP together with two configurable upper and lower deviation bands.
Reversal Signal Markers — Shows bullish and bearish reversal signals after price returns back
through the selected deviation band.
Historical Probability Labels — Displays the historical VWAP target hit rate beside each new reversal signal for the corresponding band.
VWAP Target Lines — Draws a projected target from every signal to the current VWAP until the trade either succeeds or expires.
Target Confirmation Marks — Places a confirmation mark when a tracked signal reaches its VWAP target within the selected expiry window.
🟠 HOW TO USE
Choose the VWAP anchor period that matches your trading style, such as session, week, or month.
Watch for price to extend beyond a VWAP deviation band and then move back through that same band before considering a reversal signal.
Compare the probability label shown with the signal to understand how that band has performed historically.
Use the dashed VWAP target line as the expected mean reversion objective for the active signal.
Treat the displayed probability as historical context rather than a prediction of future performance.
🟠 CONCLUSION
VWAP Reversal Probability Signals combines an anchored VWAP, volume-weighted deviation bands, reversal signals, and historical outcome tracking. By measuring how often each type of reversal has returned to the VWAP, it provides both reversal locations and statistical context for those signals. Indicatore

Adaptive SuperTrend AI - Regime-Tuned [Dots3Red]📈 ADAPTIVE SUPERTREND AI — REGIME-TUNED
Classic SuperTrend uses one fixed ATR multiplier forever. That single number is a compromise: tight enough to track trends closely, it whipsaws during ranges; wide enough to survive ranges, it lags badly once a real trend starts. This script replaces the fixed multiplier with one that changes based on what kind of market is actually happening, using the same regime-detection engine shared across the Dots3Red catalog.
🧠 THE REGIME ENGINE
Every bar is classified into one of four states using ADX and the Choppiness Index together:
• 📈 TRENDING — ADX confirms directional strength and Choppiness confirms low chop
• 🔁 RANGING — the opposite: weak directional strength, high chop
• ⚡ VOLATILE — current ATR has expanded well beyond its baseline, regardless of direction or chop
• ❔ UNCERTAIN — none of the above conditions are clearly met
The raw regime reading is smoothed by taking the most frequent classification over a short lookback window, so a single noisy bar can't flip the regime label back and forth.
🤔 WHY RANGING GETS THE WIDEST BAND, NOT TRENDING
This is the part that looks backwards at first glance, so it's worth explaining directly. A ranging market chops back and forth around a mean — if the band were narrow here, ordinary noise would cross it constantly, causing false flips. So RANGING gets the widest multiplier (default 3.5×), letting normal chop stay inside the band. A TRENDING market is moving with genuine conviction, so a moderate multiplier (default 2.5×) tracks the move closely without giving back excessive profit before flipping on an actual reversal. VOLATILE conditions get the widest multiplier of all (default 4.5×) as a purely defensive setting, since sudden expansion is unpredictable by nature.
When the regime changes, the active multiplier doesn't jump to its new value instantly — it glides toward it over a configurable number of bars. This prevents the band from visibly teleporting on a regime transition, which would otherwise look jarring and could itself trigger a false flip right at the transition point.
The underlying band mechanics — the ratcheting upper/lower band logic, and a flip only when price closes beyond the active band — are the same as classic SuperTrend. Only the multiplier driving the band width is dynamic.
✅ THE CONFIDENCE LAYER
A SuperTrend flip is a single binary event: price crossed the band, direction changed. This script adds a secondary read on how convincing that flip actually is, using 8 independent checks against the new direction:
1. Close vs. a trend moving average
2. MACD histogram sign
3. Recent higher-high / lower-low structure
4. Close vs. the SuperTrend's own midline (hl2)
5. RSI side of 50
6. +DI vs. -DI dominance
7. Volume above its moving average on a trend-direction bar
8. Whether the regime is currently TRENDING
Every confirmed flip shows this count directly on its label — "▲ 6/8" means 6 of the 8 checks currently agree with the new uptrend. A flip with 7/8 agreement and one with 3/8 are treated identically by the raw band mechanics, but this layer gives a way to distinguish a well-supported flip from a marginal one at a glance.
🎯 FLIP WIN-RATE TRACKING
Each flip is graded once the following flip occurs: did price actually finish above the flip price (for an up-flip) or below it (for a down-flip) by the time direction changed again? This produces a running win rate — for example "58% (n=34)" — shown in the dashboard. It is a simple, honest measure of how the flips on this specific chart have actually played out, not a backtest or a promise about future flips.
🔒 NON-REPAINTING
Flips, confidence readings, and labels are all evaluated only on confirmed (closed) bars. A flip that appears on the chart will not later disappear or move to a different bar as new price data arrives.
🎨 VISUALS AND CUSTOMIZATION
The SuperTrend line and gradient fill are colored by current direction. Flip labels appear directly on confirmed flip bars with their confidence count. An optional background tint can shade the chart by current regime. All four core colors (bullish, bearish, volatile/warning, and uncertain/neutral) are fully customizable in settings, independent of the script's default palette.
The dashboard (position configurable) shows: current direction, current regime, the active ATR multiplier, the confidence count with a progress bar, the running flip win rate, and the raw ADX, Choppiness, and ATR ratio readings behind the regime classification.
🧭 HOW TO USE
👀 Reading the line and fill — the colored line and gradient fill show current direction at a glance. This is the same information classic SuperTrend gives you; the difference here is in how the band width behind that line was chosen.
🧠 Check the regime before trusting the band width — the dashboard's Regime row tells you why the band is currently as wide (or narrow) as it is. A band that looks unusually wide isn't a bug — it likely means the engine has classified the market as RANGING or VOLATILE and widened defensively. Knowing the current regime helps set expectations for how the band will behave if conditions stay the same.
✅ Use the confidence count to gauge flip quality, not to filter flips — every flip is real and non-repainting regardless of its confidence count. The count is a lens for judging how broadly supported a given flip is, not a gate that decides whether one occurs. A "▲ 7/8" flip and a "▲ 3/8" flip both mean the band was crossed; the number tells you how much independent agreement existed at that moment, which is useful context when deciding how much weight to put on that particular signal versus your own analysis.
🎯 Watch the flip win rate as a running self-check on this chart — because it only starts once flips have accumulated and been graded, treat an early or low-sample win rate as inconclusive rather than a verdict. It becomes more informative the longer the script runs on a given symbol and timeframe.
🔔 Regime changes are themselves informative — the alert for a regime change fires independently of any flip. A shift from RANGING to TRENDING, for example, can be useful context on its own, since it signals the band is about to glide toward a different multiplier even before any flip occurs.
🚫 This script describes band behavior, not entries or exits — it does not tell you when to open or close a position. Use it as one input alongside price action, structure, and whatever other analysis you already rely on.
⚙️ SETTINGS
📈 SuperTrend Core
• ATR Length
• Factor — Trending / Ranging / Volatile / Uncertain — the four regime-driven multipliers
• Factor Transition (bars) — how gradually the multiplier glides between regimes
🧠 Regime Engine
• ADX Length, Choppiness Length, ATR Baseline Period
• Trending / Ranging Thresholds — where the combined ADX+Choppiness score is classified
• Volatile ATR Multiple — how far above baseline ATR counts as volatility expansion
• Regime Smoothing — lookback window for the majority-vote smoothing
✅ Confidence Layer
• Trend MA Length, RSI Length, Structure Lookback — parameters for the 8 confidence checks
🎨 Visualization
• Gradient Fill, Flip Labels, Regime Background Tint — each toggleable independently
• Full color customization for all four regime/direction colors
🖥️ Dashboard
• Show/hide, position
📝 NOTES
The regime engine needs a short warm-up period before its smoothing window is fully populated; early bars on a fresh chart may show less stable regime labels than bars further along. The flip win rate starts empty and only becomes meaningful after several flips have occurred and been graded.
⚠️ DISCLAIMER
This is an analytical and visualization tool. It does not generate trade signals and does not constitute financial advice. Historical flip win rate does not guarantee future performance. Indicatore

Regression Trend [MiesOnCharts]Regression Trend - Mies
What it does
This indicator fits a linear regression line to price over a rolling window and draws a corridor around it based on the statistical error of that fit. The corridor is what decides the trend state. As long as price stays inside it, nothing changes. When price closes outside one side, the whole thing flips color and a triangle marks the bar.
The result is a trend line that carries its own tolerance band with it, so you can see at a glance both where the fitted trend sits and how much room price has before the state changes.
How it works
A least squares regression is fitted across the lookback window. That gives the center line.
Around it, the script computes the standard error of the estimate, which is the typical distance between actual price and the fitted line. It comes from the correlation between price and time:
r is the correlation of the source with bar index over the window
residual variance is the price variance scaled by (1 - r²)
the standard error is the square root of that, adjusted for the degrees of freedom of the fit.
This is the part that makes the corridor behave differently from a standard deviation band. The width responds to how well price is actually tracking the trend, not just to raw volatility. A strong, clean trend produces a high correlation, small residuals, and a narrow corridor, so the indicator stays sensitive.
Choppy price that wanders around the line produces a weak fit, a wide corridor, and a much higher bar for triggering a state change. The indicator effectively demands more evidence in exactly the conditions where evidence is thin.
The bands sit at the center line plus and minus a multiple of that standard error. A close above the upper band turns the state bullish, a close below the lower band turns it bearish, and everything in between leaves the previous state untouched. That hysteresis is intentional. It is what stops the indicator from flipping every time price crosses its own mean.
On the chart
Regression line, green when the state is bullish, red when bearish, gray before the first breakout
Upper and lower standard error bands with a light fill between them, colored to match the current state Triangle below the bar when the state flips bullish Triangle above the bar when the state flips bearish.
Display controls to hide the fill, or the bands entirely, if you want a bare trend line
Two alert conditions, one for each direction
Settings
Source sets which series gets fitted. Close is the standard choice. HL2 or a smoothed input will give a calmer line and fewer flips.
Regression Window sets how many bars the fit covers. Shorter windows follow recent structure and react fast. Longer windows describe the broader trend and produce fewer, slower signals. This is the main setting for matching the tool to your timeframe.
SE Band Multiplier controls how far price has to move from the fitted line before the state changes. Lower values tighten the corridor and generate more signals. Higher values require a more decisive break and filter more noise, at the cost of entering later.
Display group toggles the bands and the fill, and adjusts band opacity.
How to use it
The most direct use is as a trend filter. Trade only in the direction the line is colored and treat the opposite flip as your exit or your cue to step aside.
The corridor itself gives you two readable things. Its width tells you how well price is respecting the trend, so a corridor that has narrowed over recent bars means the fit is tightening and the move is orderly. A corridor that has ballooned means the fit has broken down and the state you are looking at is stale. The center line works as a dynamic reference within an established regime, since a pullback toward it is price returning to its own fitted mean rather than to an arbitrary level.
It pairs well with a volume or momentum check. A corridor break tells you the move is statistically unusual relative to the current fit, but it says nothing about whether there is participation behind it.
Behavior worth understanding
The regression is recalculated on every bar, and the corridor plotted on each bar is that bar's own fit. This is a running envelope, not a fixed channel anchored to a pivot, so the bands will look wavier than a manually drawn regression channel. The reference moves with price, which is what keeps the state stable through a sustained run.
Signals are evaluated on the live bar, so a flip can appear and then vanish before the bar closes. Wait for bar close if you need signals that hold.
Limitations
Linear regression assumes price is moving in a straight line across the window, which is never fully true. The fit degrades at sharp reversals and around gaps, and the corridor is slow to acknowledge a turn right after a strong move because that extension is still inside the window. Treat this as a description of current trend structure, not a forecast.
Disclaimer
The indicator provided is not financial advice. Always conduct your own research and consider multiple factors before making trading decisions. Trade at your own risk. Indicatore

Trend-Aligned Oscillator Reversal Engine Comprehensive Guide: Trend-Aligned Oscillator Reversal Engine
Introduction: What is this script and its primary purpose?
The "Trend-Aligned Oscillator Reversal Engine" is a highly sophisticated, multi-layered custom indicator written in Pine Script for the TradingView platform. Unlike traditional single-metric indicators that often produce false signals in choppy markets, this script functions as a complete, self-contained trading system.
Its primary purpose is to identify high-probability market reversal points by combining momentum exhaustion with strict trend-following filters. The script aims to solve a common dilemma for traders: getting into a reversal early enough to maximize profit, while ensuring the broader market structure supports the trade. By demanding a "confluence of evidence" from multiple technical sources before issuing a buy or sell signal, it minimizes the risk of catching falling knives or shorting into parabolic uptrends. Furthermore, it includes automated alert conditions, making it seamlessly compatible with external platforms via webhooks, Telegram, or API integrations for automated trading.
Working Mechanism: How does it detect trading signals?
The script generates Buy and Sell signals through a complex, dual-engine architecture combined with a dynamic entry delay system. It operates using three distinct technical phases:
1. The Oscillator Reversal Engine (The Trigger)
This engine acts as the primary signal detector, scanning for moments when the market is overextended and ready to snap back. It aggregates data from four classic momentum oscillators:
RSI (Relative Strength Index): Set to a standard 14-period lookback, it detects extreme price levels. A long signal requires the RSI to cross back above the 30 (oversold) threshold, while a short signal triggers when crossing below 70 (overbought).
Stochastic Oscillator (14, 3, 3):This measures closing prices relative to the high-low range. It looks for bullish %K and %D crossovers below the 20 level and bearish crossunders above the 80 level.
Oscillator MACD (12, 26, 9): Identifies shifts in short-term momentum via the crossover or crossunder of the fast MACD line and the signal smoothing line.
CCI (Commodity Channel Index - 20): Detects when cyclical boundaries are breached, triggering upon crossing the -100 or +100 levels.
Confluence Scoring: Rather than relying on just one metric, the script assigns a score of 1 to 4 based on how many oscillators trigger simultaneously. The user can define the `osci_min_score` (default is 1) required to generate a baseline reversal signal.
2. The Trend Confirmation Engine (The Filter)
If the `use_trend_filter` setting is enabled, a reversal signal is completely blocked unless the broader market trend aligns with the trade direction. This engine evaluates five distinct trend indicators:
EMA (50-period): Assesses if the current price is above or below the baseline moving average.
ADX & DMI (14-period): Ensures there is actual trend strength (ADX > 20) and identifies whether buyers (+DI) or sellers (-DI) are in control.
Trend MACD: Validates medium-term momentum direction relative to the zero line.
Supertrend : Evaluates volatility-based trailing support and resistance bands.
Ichimoku Cloud: Checks if the price is trading above the Kumo Cloud (bullish) or below it (bearish).
Trend Scoring:Similar to the oscillators, it calculates a trend score out of 5. By default, at least 3 out of 5 indicators (`trend_min_score`) must agree to confirm the trend's legitimacy.
3. The Retest State Machine (Entry Optimization)
When a trend shift occurs, the script features an optional "Retest Mode". Instead of entering immediately on a breakout—which often leads to fake-outs—the system waits for the price to retest a specific support/resistance level. This level is calculated dynamically using a 14-period Average True Range (ATR) multiplier. The script will wait for a maximum number of candles (default is 3) for this retest to happen before validating or discarding the setup.
How to Use: Recommended Settings and Suitable Markets
Recommended Configurations:
For Conservative Traders: Increase the `osci_min_score` to 2 or 3. This means at least two or three oscillators (e.g., RSI and MACD) must agree simultaneously, drastically reducing false signals. Always keep `use_trend_filter` set to `true`.
Trade Direction Filter: If you are trading in a confirmed macro bull market (like Bitcoin leading up to a halving), set the `trade_direction` to "Buy Only". This ensures you only catch the dips in a larger uptrend and prevents you from fighting the primary market direction.
Retest Mode Adjustments: In highly volatile conditions, leave "Enable Retest Mode" checked with an ATR multiplier of 1.0 to secure better entry prices. In aggressive breakout markets where pullbacks are rare, you may want to disable this feature so you do not miss fast-moving trades.
Suitable Markets and Timeframes:
Because of its reliance on confluence, trend strength, and ATR volatility, this indicator is highly versatile.
Markets: It performs exceptionally well in the Forex market (e.g., EUR/USD, GBP/JPY) where trends and mean-reversions are clearly defined. It is equally effective in Crypto (BTC, ETH) and Indices (S&P 500, NASDAQ) because the rigorous trend-filtering engine automatically strips out the "noise" and fake-outs typical in high-volatility assets.
Timeframes:The script is optimized for medium to higher timeframes. The 15-minute (15m), 1-hour (1H), and 4-hour (4H) charts are ideal. Using it on lower timeframes (like the 1-minute chart) is not recommended, as micro-market noise can prematurely trigger the oscillators before the macro-trend indicators have time to align. Indicatore

5 Trend Indicators Combo IndicatorThe 5 Trend Indicators Combo with Retest Logic: A Comprehensive Guide
The "5 Trend Indicators Combo Indicator" is an advanced, multi-faceted technical analysis tool built using Pine Script for TradingView. Its primary purpose is to identify high-probability trend reversals and continuations by aggressively filtering out market noise and minimizing false breakout signals. Instead of relying on a single, isolated metric—which can often be misleading—this script utilizes a robust "confluence" methodology. It systematically evaluates five distinct, highly respected trend-following indicators, aggregating their individual statuses into a unified scoring system. Furthermore, it elevates standard signal generation by incorporating an intelligent pullback (retest) mechanism, explicitly designed to optimize entry prices so that traders do not buy at the absolute top or sell at the bottom of a sudden, volatile price spike. Additionally, it features a built-in graphical dashboard that allows traders to instantly monitor the bullish or bearish status of all five indicators in real-time.
Working Mechanism: How does it detect trading signals?
The core engine of this script evaluates five technical pillars, each contributing a maximum of one point to a total "Bull Score" or "Bear Score":
1. Exponential Moving Average (EMA): Defaulted to a 50-period length, the EMA establishes the chart's baseline directional bias. A bullish point is awarded if the current closing price is strictly above the EMA, and a bearish point is given if it is below.
2. Average Directional Index (ADX) & DMI: This component measures the absolute strength and direction of a trend. To score a point, the ADX value must exceed a specific threshold (defaulted to 20), acting as a strict filter to ensure the market is actually trending rather than chopping in a sideways range. Once this threshold is met, the Directional Indicators dictate the bias: +DI must be greater than -DI for a bullish point, and vice versa for a bearish point.
3. Moving Average Convergence Divergence (MACD): Operating with standard 12, 26, and 9 periods, the MACD assesses momentum shifts. The script requires strict criteria here: for a bullish score, the MACD line must be above the Signal line *and* above the zero baseline. Bearish points require the MACD line to be completely below both.
4. Supertrend:Utilizing a multiplier of 3.0 and an ATR period of 10, the Supertrend acts as a volatility-adjusted trailing stop. It awards a point depending on whether the current trend is mathematically calculated as bullish (direction < 0) or bearish (direction > 0).
5. Ichimoku Cloud (Kumo): The script analyzes the relationship between the closing price and the Kumo (Cloud), which is defined by Senkou Span A and Span B projected 26 periods into the future. A bullish point is granted only if the price has successfully broken out above the top boundary of the cloud, signifying dominant long-term momentum. A bearish point requires a breakdown below the bottom boundary.
Once the overall score is tallied (ranging from 0 to 5), the script compares it against a user-defined "Minimum Confluence Score". When the score crosses this threshold, an initial trend signal is generated. However, the script's standout technical feature is its "Retest / Pullback" logic. Instead of firing the final execution alert immediately upon the breakout, the script enters a "pending" state. It calculates a dynamic retracement target using an Average True Range (ATR) multiplier. For a buy signal, the price must briefly retrace down to `Close - (ATR * Multiplier)`. The script waits for a maximum number of candles (default is 3) for this pullback to occur. If the price successfully touches this retest level, a highly optimized, safe entry is signaled. If the time expires without a retest, the script automatically fires a delayed entry to ensure the trader does not miss a runaway trend.
How to Use: Optimal Settings and Suitable Markets
To deploy this indicator effectively, traders should focus on optimizing the 'Minimum Confluence Score'. A score of 3 is the recommended baseline, offering a healthy balance between trade frequency and signal accuracy. Increasing this to 4 or 5 will result in much stricter, albeit fewer, high-conviction signals. The Retest ATR Multiplier and Max Wait Bars must be adjusted according to the timeframe; faster timeframes might require smaller ATR multipliers to successfully catch brief micro-pullbacks before the timer expires.
Regarding suitable markets, this indicator is exclusively designed for trending environments. It performs exceptionally well in high-liquidity, directional markets such as major Forex pairs (e.g., EUR/USD, GBP/JPY), large-cap cryptocurrencies (Bitcoin, Ethereum), and major stock indices (S&P 500, NASDAQ). Because it relies heavily on trend-following logic and moving averages, it is most appropriate for medium to higher timeframes, particularly the 1-hour, 4-hour, and Daily charts. Using it on extremely low timeframes (like 1-minute or 3-minute charts) may expose it to excessive intraday noise and erratic wicks, though the ADX filter and Retest mechanism will actively attempt to mitigate those risks. Ultimately, this script transforms a standard chart into a highly systematic, rule-based trading system. Indicatore

High Volume Breakout Targets [AlgoAlpha]🟠 OVERVIEW
High Volume Breakout Targets identifies price zones formed by related pivot highs or pivot lows. These zones represent areas where price previously reacted around overlapping wick and candle-body levels.
The indicator then checks whether price closes through a zone with enough of the breakout candle extending beyond its boundary. Qualified breakouts can display directional labels, an entry level, and three targets based on the height of the broken zone.
Normalized volume candles are also shown inside recent active zones. This helps traders compare current volume with its recent average while watching price interact with a potential support or resistance area.
🟠 CONCEPTS
Pivot High Zone — A resistance area formed when a confirmed pivot-high wick falls within the body of a previous pivot-high candle. The zone spans the associated wick highs and body-top levels.
Pivot Low Zone — A support area formed when a confirmed pivot-low wick falls within the body of a previous pivot-low candle. The zone spans the associated wick lows and body-bottom levels.
Pivot Confirmation — A pivot requires the selected number of bars on both sides of the turning point. A higher Pivot Length identifies broader structures but confirms them later and less often.
Zone Maximum Age — The maximum number of bars during which two pivots can be associated and an active zone can continue extending. An expired zone remains visible but no longer produces a breakout.
Qualified Breakout — A breakout requires a confirmed close above a bearish zone or below a bullish zone. It must also place the selected percentage of the candle’s full range beyond the broken boundary.
Normalized Volume — Current volume is divided by its 20-bar average. The resulting ratio controls the size and transparency of the volume candle displayed inside an active zone.
Breakout Targets — The breakout close becomes the entry level. The broken zone’s height is divided into three equal steps to calculate TP1, TP2, and TP3 in the breakout direction.
Target Expiry — Each target setup remains active for a selected number of bars. When TP1 or TP2 is reached, the remaining unhit targets receive a new expiry period from the hit candle.
🟠 FEATURES
Pivot Zones — Displays bullish support zones and bearish resistance zones created from associated pivot structures.
Breakout Labels — Marks bullish and bearish closes that satisfy the selected outside-range requirement.
Three-Level Targets — Displays the breakout entry, a target area, and TP1, TP2, and TP3 levels derived from the broken zone’s height.
Zone Volume Display — Shows normalized volume candles inside the four most recently active zones.
Target Completion Marker — Prints a checkmark on the first candle whose wick reaches TP3.
🟠 HOW TO USE
Adjust Pivot Length to match the structure you trade. Use lower values for smaller and more frequent zones, or higher values for broader and less frequent zones.
Treat bullish zones as potential support and bearish zones as potential resistance while they continue extending.
Watch how price behaves inside a zone. Use the normalized volume candles to compare participation with the recent volume average.
Wait for a breakout label rather than treating every wick through a zone as a breakout. A label appears only after the candle closes beyond the boundary and meets the Minimum Breakout Range setting.
Use a higher Minimum Breakout Range to require more of the breakout candle to trade beyond the zone. Use a lower value to accept less decisive moves.
After a qualified breakout, use the entry line as the breakout reference and TP1, TP2, and TP3 as zone-based projection levels.
Check whether targets are reached before their expiry. TP1 and TP2 extend the active period for the remaining targets when reached.
Combine the zones and breakout signals with market structure, trend direction, liquidity, and risk controls. The indicator does not define a stop-loss or position size.
🟠 CONCLUSION
High Volume Breakout Targets combines pivot-based support and resistance zones, normalized volume context, qualified breakout signals, and zone-height target projections. It gives traders a structured way to assess price interaction with established zones and track the progression of confirmed breakouts. Indicatore

Renko Keltner Trend Engine - Brick Based Buy Sell SignalsDESCRIPTION:
█ RENKO + KELTNER CHANNEL = A MATCH MADE FOR TREND TRADING
This indicator rebuilds the classic two-window "Keltner Channel + Renko" trend strategy as ONE self-contained tool — and paints real Renko bricks directly on your normal candle chart. No Renko chart subscription needed, no second window: both Renko engines are built internally from chart data, and every indicator runs on the BRICK series, not on time bars.
█ HOW THE STRATEGY WORKS (the exact rule set)
The system uses TWO Renko engines side by side:
1 — TREND FILTER (3x brick Renko + Stochastic 1,1,1)
The big-brick Renko removes all noise. A fast stochastic (1,1,1) on those bricks produces a clean square-wave regime line:
• Crosses UP through 20 → regime turns BULLISH → longs only
• Crosses DOWN through 80 → regime turns BEARISH → shorts only
The regime stays valid until the opposite cross happens.
2 — EXECUTION WINDOW (1x brick Renko + Keltner Channel + Stochastic 7,3,3 + 9 MA)
• Keltner Channel with the classic settings: EMA 20 mid line, 2 x ATR 10 bands — computed on the Renko bricks, so the channel hugs the brick ladder
• Entry: stochastic (7,3,3) crosses in the regime direction AND one FULL Renko brick closes completely OUTSIDE the Keltner channel → that breakout brick is the entry
• Stop: the middle Keltner band (EMA 20) at entry
• Exit: a brick closes back through the 9-period MA (below for longs, above for shorts)
Simple, mechanical, fully rule-based — and every signal on the chart explains WHY it fired (hover the BUY/SELL pill for the full checklist: regime, stochastic values, breakout level, entry, stop).
█ WHAT YOU GET ON THE CHART
• Real RENKO BRICKS painted over your chart (green/red ladder) — you SEE the logic the signals are computed on
• Keltner Channel (gold bands + mid stop line) and the white 9 MA exit line, all computed on bricks
• Designed BUY ▲ / SELL ▼ signal pills with full "WHY THIS TRADE?" tooltips
• TREND ▲/▼ flip tags whenever the 3x-brick filter changes regime
• Entry + stop lines for the running trade, ✓/✗ exit marks with result tooltips
• Animated cockpit panel: Renko engine info (both brick sizes), 4-step entry checklist with live status, position box, live trade counter + win rate
• Auto (ATR) brick sizing so it works on ANY symbol and timeframe out of the box — or fix the brick size manually (e.g. $3 on ES with $9 filter, the classic setup)
█ WEBHOOK AUTOMATION READY
Create ONE alert with condition "Any alert() function call" and paste your webhook URL. The indicator fires ready-to-use JSON on every event:
BUY / SELL / MA_EXIT / SL_HIT — including symbol, price, stop, brick size, regime, win rate, timeframe and timestamp. Plug it straight into bots, bridges and auto-traders.
█ HOW TO USE
1. Add to a liquid symbol (indices, gold, FX, crypto). The video setup: S&P 500 E-mini, 1-min data, $3 brick / $9 filter
2. Leave brick mode on Auto (ATR) or set your fixed brick size
3. Wait for the checklist in the panel to light up: ① Trend Filter ② Stochastic ③ Brick outside Keltner ④ Entry
4. Manage by the rules: stop = mid band, exit = 9 MA recross — or automate it via webhook
█ NOTES
• Signals are computed on confirmed bricks from confirmed bars — no repainting of past signals
• The Renko engines need warm-up bricks; on fresh charts give it a moment of history
• This is a trading TOOL, not financial advice. Test any setting on your market before going live.
Open source — read it, change it, learn from it.
WHY THESE PARTS BELONG TOGETHER
Renko strips time out of the chart and shows only committed movement, but it has no sense of
whether that movement is stretched or normal. A Keltner channel measures exactly that, but on a
time chart it is constantly distorted by bars that carry no movement at all. Building the channel
on the brick series instead of the candle series is the whole point of this script: the volatility
envelope is finally measured on the same axis the trend is measured on.
Indicatore

Indicatore

Strategia