AUDNZD Buy Idea Based On Multi-timeframe Analysis
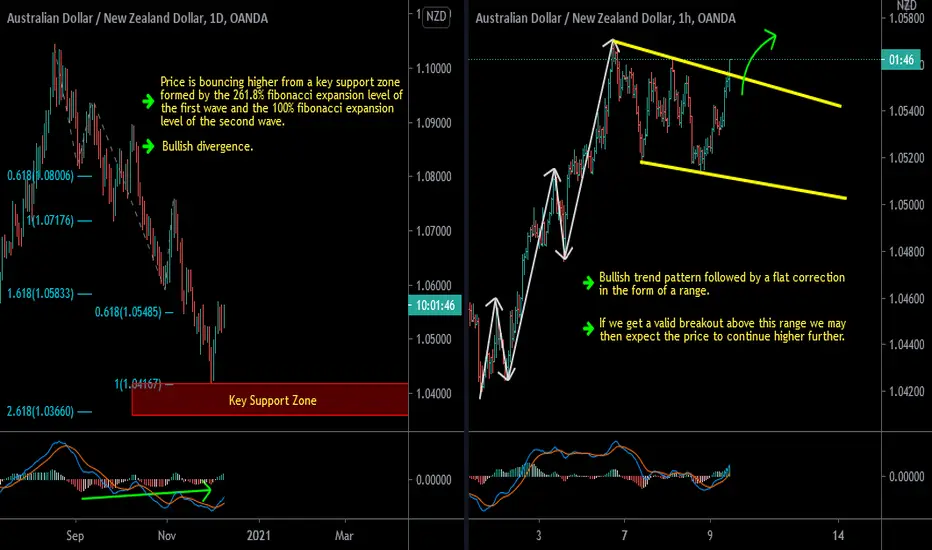
D1 - Price is bouncing higher from a key support zone formed by the 261.8% fibonacci expansion level of the first wave and the 100% fibonacci expansion level of the second wave.
Bullish divergence.
H1 - Bullish trend pattern followed by a flat correction in the form of a range.
If we get a valid breakout above this range we may then expect the price to continue higher further.
Bullish divergence.
H1 - Bullish trend pattern followed by a flat correction in the form of a range.
If we get a valid breakout above this range we may then expect the price to continue higher further.
Nota
A valid breakout above the range happened as expected and the price moved higher further providing an amazing move to the upside!Declinazione di responsabilità
Le informazioni e le pubblicazioni non sono intese come, e non costituiscono, consulenza o raccomandazioni finanziarie, di investimento, di trading o di altro tipo fornite o approvate da TradingView. Per ulteriori informazioni, consultare i Termini di utilizzo.
Declinazione di responsabilità
Le informazioni e le pubblicazioni non sono intese come, e non costituiscono, consulenza o raccomandazioni finanziarie, di investimento, di trading o di altro tipo fornite o approvate da TradingView. Per ulteriori informazioni, consultare i Termini di utilizzo.